Thursday, November 21, 2019

A Nifty Technique For Precision Marking

Since I am now seriously back in the swing of working on the Steampunk Protostar build, I noted that, while marking out new riveted panels, I was utilizing a technique that I would like to share with you blog readers.

Anyone who is familiar with old-school, hand mechanical drafting would probably know this one.  In this day and age, however, with all the available forms of CAD software, this technique has gone the way of the rotary dial telephone.

The idea is simple: maintaining a very sharp tip on your marking pencil.
By keeping a sheet of fine grit sandpaper on the workbench, one can stop frequently during marking operations to sand a sharp chisel tip into the pencil lead.


This has two benefits:
First, the sharpened tip can produce an extremely thin, precise mark or line.  This is highly useful to those who build scale models, where utmost precision is required.

Second, the chisel tip can be butted up extremely tight into the right angle formed by the part surface and straight-edge. No pencil-lead width errors are introduced that might throw off a precision measured line.

This technique can be used with normal mechanical pencils using #2 lead.  They just have to be sharpened more often.
Harder leads such as number 4 or 5 are better, as they will hold a sharp edge longer, though producing a lighter line.


Monday, November 18, 2019

Steampunk Protostar, Part 32 - "A Little More Air, Please!"

The backyard deck build is finally finished!
Phew, what a ride....
Attention can now turn back to model rocketry, the long running Protostar build in particular.
This weekend saw the completion of an external air scoop for this "Ship of Fancy"
The build was very simple, with the scoop parts being cut from 1/16 balsa.


 Another curved balsa mounting plate similar to the one used on the launch lugs and smoke vent assemblies.


An application of glue dot rivets...


And a couple coats of  flat aluminum paint.


Done!

Stay tuned for yet more 'riveting' action!

Monday, October 7, 2019

What's Up With The Lack Of Posts?

Hi, folks,
You probably have noticed a drop in the number of posts here recently. 
This is because I have embarked on a major deck and roof cover project at my home, which, of course, is taking up a substantial amount of my so-called 'free time'.
I haven't even found time to work on model rocket building.
I hope to be wrapping up the construction work before the snow flies, so I can return to rocketry soon.
Keep checking in....

Sunday, September 15, 2019

A Successful Keychain Cam Flight

A little over a week ago, on September 6th, I flew a Quest Big Rage with an 808 keychain video camera strapped to the payload section.  This marked the first time since 1981 that I flew a model rocket with any kind of a camera attached to it, that being an Estes Cineroc.

This flight went very well, but when I got the camera home, and the video transferred to the PC, I found that neither of the two installed media player software packages I had would work right.  One would stop video after five seconds, but continue with the audio. The other would play the video correctly, but when I wanted to pause and capture a single frame, the image would go black.

Yesterday, I found a good media player package download that claimed it would take care of any format...and it worked.

So, here are some still pics of the flight:

Shortly after liftoff. 

 Up until now, I have been taking photos of my model rockets.  This time, the rocket took a picture of me!

Several still frames of the flight.....


During the wild recovery under the parachute, the camera caught this single frame image of the booster section....


Now, I need to get to work on coming up with a stable parachute recovery system that will allow the camera to point groundward, and minimize payload spinning.

Future plans for camera projects include getting the keychain successfully adapted to boost glider flight.


Monday, September 9, 2019

Launch Date: 6 September, 2019

Today's rocket flying session at Dove Valley Regional Park in Centennial, Colorado, was planned to take advantage of some good weather models for the date.  There was the potential for up to five area model rocketeers participating to make it somewhat of a 'mini-meet'.

Mike Goss arrived on the scene around 7:00 a.m. Myself and others couldn't make it until 9:00 a.m., so Mike ended up launching three flights on his own.

These included a Thunderbee FlutterBy and an Estes Asteroid Hunter.

Unfortunately, I wasn't there to witness these flights but Mike emailed me some nice pictures....


Jim Gazur and Myself arrive on the scene around 9:20 a.m. after Mike had long gone.

The weather had turned a bit unsettled with winds at 5 to7 mph, cloud cover, and even some small isolated rain showers.

Nevertheless, we set up and began launching rockets.

The first model off the pad was my Hornet on an A3-4T motor.  It boosted straight and high, recovering successfully on a 10" parachute, staying well within the bounds of the park.


Next up was my Griffin 2 rocket with an Estes Firefly glider attached.  The tandem flew well on an A8-3 motor, but the glider failed to detach at ejection.  The whole model parachuted in safely and undamaged.


At this point, we had to halt operations for several minutes, and cover things up as a small rain cloud moved through.

At about 10a.m., the little weather front moved out, skies cleared, and wind dropped to a minimum.

Jim's first flight of the day was an Avionics testbed vehicle being used to try out a dual deployment system he has been working on.  With D12-5 power the streamer separated (broken snap swivel), and the main chute deployed at ejection.  Not exactly the results Jim wanted, but the model recovered successfully.


Next up was a flight of my Canopus-2, a custom designed cluster bird.  Today, I launched it only on a single core B6-4 motor for a perfect flight and recovery.


Jim launched his RC-controlled FlatCat boost/glider to continue development testing.  He managed to get some rudder-only control over the glide flight path.


At the end of its flight, the 'Cat was headed right toward Your Truly Photographer.  Here is a shot of the bird as it whizzed by only a couple feet away.


My next flight was turned in by my Mini-Maggot-3 boost/glider on a 1/2A3-2T motor. The model boosted straight up and deployed perfectly at ejection.  Wheeling around in its signature tight turn, the model glided well.
Jim and I were highly amused as we watched a bird (a real one) fly in and attempt to chase and attack the glider!  After a few moments, the bird gave up and flew off, allowing the Mini-Maggot to live.
I had accidently turned my cel phone video off right after liftoff, so I didn't catch the incident.  Also, I didn't get a duration time, but Jim and I estimated around 1 minute.  Glider and pod were recovered successfully.


Jim tried another flight of his FlatCat, only to have the motor blow out the ceramic nozzle, causing the model to jump maybe 16 inches up the launch rod.  Jim said the A3-2T motor he used was around 40 years old.  Here's a good pic of the incident:


Jim flew the model a second time a little bit later.


Next bird was my Satellite Interceptor.  Perfect flight on a B6-4 motor with easy recovery.


At this point, Jim and I had noticed a strange phenomenon:  Even though my wind marker streamer was indicating breezes on the field, all of the models were recovering nicely nearby with very little horizontal drift.  We surmised that the winds were present only close to the surface of the field, while conditions aloft were extremely calm.

Next, Jim flew his RC Sky Slash for another test run.  Unfortunately, the bird went into a series of stalls, not allowing any control over the glide path.


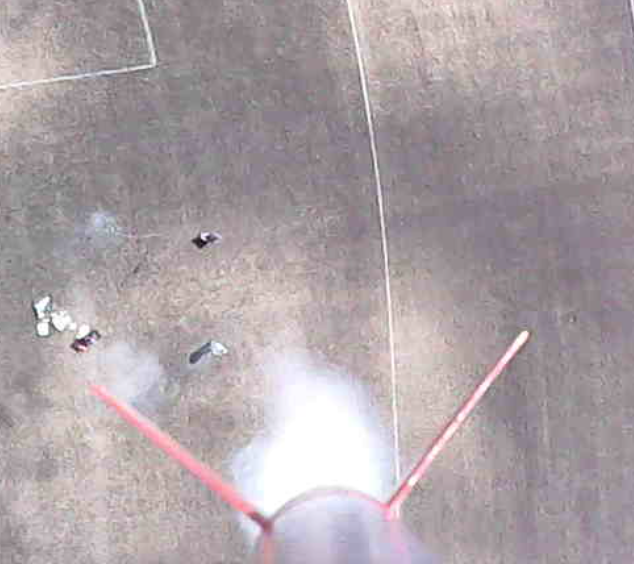
My last flight of the day went to the Quest Big Rage with an 808 keychain video cam strapped to the payload section.  The model flew straight and high on a C6-5 motor, and was successfully recovered on a 15" square (?) parachute.
(Strangely, when I got home, I couldn't find the BR's nose cone in the model box.  Guess I'll have to turn another one...)


The last flight of the day went to Jim's Heli-Rocter on a 1/2A motor.  The model boosted and deployed the rotors nicely, but didn't start spinning until the bird was a mere ten feet off the ground.


All in all, it was a very fun and satisfying launch session with near-perfect weather conditions most of the day.


Monday, August 19, 2019

Back To Biz-ness...

Hi, All,
I haven't posted here is some time on account of being out traveling and away from the computer. 

Today, things have returned to normal - however that can be defined - so I can get back to rocket building and blogging.

One quick note:  Last week (August 14th) marked an anniversary of sorts in my model rocketry journey.  It was on that date fifty years ago that I first witnessed a model rocket in flight.

In fact, I saw many model rockets in flight that very same day, as I was a visiting spectator at NARAM-11 in Colorado Springs!

Little did I know at the time the Model Rocket Bug would bite me hard enough that I would still be involved in the hobby half a century later...

Well....enough jabber...time to get back to the shop and get crackin' on that Protostar. I would like to get that project wrapped up by the end of September, so I can get started on the next of many in the queue.

Maybe even get some flyin' done....

Cheers!

Saturday, August 3, 2019

Steampunk Protostar, Part 31 - Smoke Stack Mounting Plate.

As with the launch lugs, the smoke stack will be attached to its own plate to mount on the rocket body. 

Construction is very similar to that of the lug mounts - a piece of laminated balsa wood is precision sanded into a curved shape to conform to the body tube:


A section of riveted panel is marked out to make the cuts to accommodate the mount assembly.

The mount itself also gets marks for locating glue-spot rivet detail.


Here is the rivet panel with cut-out section removed and replaced by the smoke stack mount.


After the application of some rivets made from Aylene's Tacky glue spots, the mounting plate gets brush painted with some flat aluminum enamel. I am not necessarily going with precision spray paint jobs on this model because I want to achieve more of a hand-made look.


Darn it...I just noticed that some of the balsa grain didn't get adequately filled.  Too late to fix that, so I must move on.


Finally, here is the unit all glued up.

Next stop - an air scoop.  Stay tuned.