Monday, April 29, 2019

Steampunk Protostar, Part 28 - A Riveting Tail

Taking a step away from the launch lug construction, the next procedure in the build is making the riveted panels for the body tube.
Each section of the tube will be done separately with eight panels of equal width applied around the model's circumference. 
This will be the most difficult section due to the need to fit the panels around the fins and the aft launch lug.
As with the fins, the riveted panels are made from Avery paper with poked-through rivet detail.
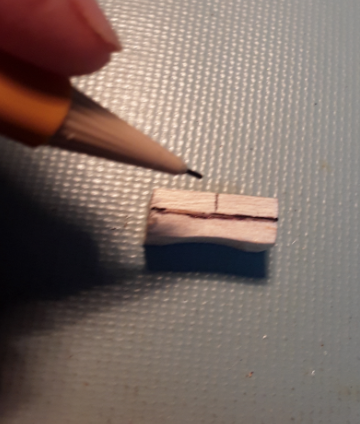
Here is the first panel measured out, marked, cut from the larger label sheet, and rivet detail applied.

 
Before affixing the panel to the model, I like to lay it along the edge of the bench and burnish the edges with an Xacto knife handle.  This helps to flatten the slightly raised edge that was formed when the panel was cut out.
 
 
Now the panel can be carefully placed into position.  Not that there is no rivet detail next to the fin root.  This area will later be covered up with an addition glue fillet layer and more detailing.
 
 
This is the panel that encompasses the aft launch lug mount.  Since I want the lug to be glued directly to the body tube later on, I must cut the paper panel to fit around the lug footprint.
 
 
Once two adjacent panels are in place, I press the seam down with the curved end of a pair of tweezers.  This evens out the edges and ensures that they are properly stuck down to the tube.
I have to be very careful not to allow the handle to wander over onto the rivet detail, as it will flatten those features out as well.
 
 
And, so it goes with the remaining panels around the circumference of the tube. 
Note that I am not overly concerned that the ends of the individual panels do not precisely line up.  These will be covered later on with some wide simulated steel banding details.
Here is the completed tail section....


Each of the panels took between half an hour to forty five minutes to lay out, cut, detail, and apply.
This is probably the most finely detailed model rocket I will ever build.  A lot of time-consuming small-scale work, but it's been fun so far.
 
Cheers.


Wednesday, April 24, 2019

Steampunk Protostar, Part 27 - Building The Launch Lug Standoffs

Now that the launch lugs themselves are completed, it's time to fashion the fancy standoff mounts.

To start off, two scrap pieces of 1/8 thick balsa are laminated together.


Once dry, four standoff blanks are carefully cut from the stock.  The lengths of the pieces are 10mm to match the mounting ring on the lugs.  The standoff widths are cut equal to the width of the riveted panels that will be applied to the main airframe, 1/8 the circumference of the body tube.


Center lines are drawn across the front and rear edges of each of the standoffs.  These are meant to be a reference for shape sanding.

Because the standoffs will conform to the curvature of the body tube, a sheet of medium grit sandpaper is wrapped around the Protostar nose cone base to make a jig for shaping the balsa wood parts.
Keeping the pieces perfectly aligned, they are carefully sanded until the apex of the curve reaches the reference line.

 
The sanded lugs are checked for fit on the body tube and marks are made for launch lug placement.


Using a sanding block, the tops of the standoffs receive a curved surface as well.


Here are the four finished standoffs.


And, the completed glued-up launch lug assemblies.  I had to be very careful with this step, in that the lugs have to be precisely aligned.


Whew...I'm feeling a bit standoff-ish today!

Perhaps a can of Mountain Dew might help....


Monday, April 22, 2019

Back In The Day, Part 19 - ...And Then There Was 'Skywatchers'....

The genesis of the Skywatchers / ROMAR model rocket club in Colorado Springs is largely shrouded in mystery - at least as far as yours truly is concerned.  The organization was already in existence before I arrived and stuck my long nose into the action.  I'm sure that any of the folks who were original members might know when the club first formed, but I haven't been in contact with them for many, many years.  Skywatchers may well have originated as early as 1972.

Anyway, at the invitation of my high school chum, Marc Kramer, I joined Skywatchers in the summer of 1973.  I was a junior in high school at the time, and had a few small models built and a little bit of flying experience under my belt, but I was still quite a neophyte to the hobby.

The original club roster consisted of maybe a dozen members, and held monthly meetings in the back room of Custom Hobbies at the intersection of Platte Avenue and Circle Drive in Colorado Springs.

The club's flying range was a large field on the east side of town off of Airport Road.  (Incidentally, Airport Road did not go to the airport....). The field was large enough to accommodate F-engine flights.  Even though the space was earmarked for future development, Skywatchers gained permission to us it in the interim. 

It's interesting to note that the second home my wife and I bought in the late 1990s was located on the downrange end of that very same field.

At the December, 1973 club meeting, it was announced that the Skywatchers Rocket Club had submitted an application to the National Association of Rocketry for becoming a chartered section.

Next Post:  The birth of ROMAR

Tuesday, April 16, 2019

Launch Date: 14 April, 2019 – An Impromptu Launch Session


Early Sunday afternoon, I found an email from fellow Castle Rock area rocketeer, James Gazur, stating that local wind and weather conditions were favorable for a launch.  How about it?
Having not flown any model rockets for nearly six months, I was totally ready for a flying fix.
I had models, launcher, and range box packed, and made the drive to the designated field in less than half an hour’s time!

The chosen field for this launch was Founders Park on the East side of Castle Rock.  I had discovered this location a few months ago, finding it extensive enough to be a solid B-engine launch site.
On arriving at the park, we found it to be about half covered with snow from a couple of recent storms.  Undaunted, we set up at one end of the field to assure enough recovery area with the five to seven mph breezes blowing at the time.

I started things off with the 42nd launch of the old Hornet.  Perfect launch and nearby recovery on an A3-4T motor and eight inch parachute.


Jim’s first flight of the afternoon went to a Semroc Heli-rocter on a ½A3-2T motor.  The model boosted nicely and deployed its rotors perfectly at ejection.  The launch video taken of the flight shows an approximate duration of 27 seconds.  Not bad at all for a 1/2A heli.


Next up was my Estes Lynx for its overall 8th flight mission.  The model boosted straight and high on an A10-3T motor and recovered via ten inch parachute to land very near the launch area.  It was discovered that three of the parachute shroud lines had been burned through at ejection, but all the lines were wound together closer to the canopy, so the parachute still operated normally.  


A pair of 7th grade boys had stopped by to witness some of the launching activities, and I ended up letting each of them push the launch button to send off my first two models.  Their presence was the first opportunity I had to hand out a couple of my new model rocket resource/info sheets. 
One of the lads said that being an astronaut was one of his career options. 
Jim exhorted him to do well in school, stick with it, and place extra emphasis on doing well in math. 
Perhaps this encounter could lead to another young person’s entry into model rocketry, as well as a future career in aerospace.

The next bird to be launched was Jim’s FlatCat glider modified for RC control. This is a developmental version utilizing rudder control only.  The model boosted nicely on an A3-2T motor (Jim still has a small supply of these gems from days of yore), and transitioned into a turning glide.  The inherent turn was a bit more than what the controls could overcome, but Jim considered it a successful test flight, nonetheless.


Next up was the maiden voyage of my recently built Alpha VI.  This launch is intended to be the model’s one and only flight, after which it will be retired and mounted in a display box.
The Alpha turned in a picture perfect flight on an A8-3 motor – straight boost, full parachute deployment, and even a soft landing a mere twenty feet away from my range box!


Jim made the comment that it was a similar such flight of an Alpha model rocket that he witnessed many years ago that sparked his interest in the hobby and led directly to his lifelong career in aerospace!

Jim soon had another experimental RC glider ready to launch – this time a modified Renger Sky Slash.  He is definitely going old school with some tried and true glider designs. The bird also uses single channel, rudder-only control.
The glider boosted nicely with A10-0T power and transitioned into  a glide after motor ejection.  Jim was able to successfully perform some control over the glide.  Another successful development test flight!


By this time, I had a scratch-built Satellite Interceptor on the pad and ready to launch.
On a B6-4 motor , the model boosted in a very straight and high trajectory.  The 12” parachute deployed nicely and the model descended smoothly.


Unfortunately, the prevailing breeze carried the model just outside of the park perimeter and into the parking lot, where it landed on the hard asphalt surface.  The SI sustained a small amount of damage - a loose dorsal fin, and two broken dowel fin antennae. 

The final flight of the day went to Jim’s Vortico from Rocketarium.  This unique little model turned in a great flight on a Quest C12-4.  The black smoke trail and rapid spinning of the model made for a very fun performance. 


With this done, we packed up and headed out, noting that most of the snow on the field had melted away during the two hours we were present.

Quote of the Day:
One of the young men who had stopped by to watch the launchings sported a head of long wavy hair. As I was setting up my wind direction indicator streamer next to a launch pad, he commented:
“My hair would work good for that!”

Monday, April 8, 2019

Back In The Day, Part 18 - A Little Colorado Rocketry History

Because my build series on the Steampunk Protostar is creeping along appallingly slowly, and I haven't had any recent launch sessions to write about, I deem it necessary to come up with some filler material with which to continue posting at regular intervals in my humble little corner of the Interweb.

Thus, I have settled upon the notion of regaling all of you with a series recalling the short history of the Skywachers / Rocky Mountain Association of Rocketry club to which I belonged back in the old fleet days.

Skywatchers/ROMAR existed in Colorado Springs during the time spanning the demise of the famous Peak City Section through a point prior to the formation of COSROCS, the present area club. At one time ROMAR was the only game in town - the sole representative of organized model rocketry in existence along the Colorado Front Range.

So, it's time to dial up the BlastFromThePast "Waayyyy-back" machine.

Next stop: 1973......

Tuesday, April 2, 2019

Steampunk Protostar, Part 26 - Not Your Everyday Launch Lugs

Hi, Blog Readers,

You might just be wondering why I should devote an entire build post to a mere, lowly launch lug.

If this were a build of a standard, run-of-the-mill model rocket, that would be a valid point.  After all, there is not much you can really say about a little paper tube glued to a bigger paper tube.

But this is the world of Steampunk.

Every single part and sub-assembly of a model rocket constructed in this genre becomes a distinctive decorative design element in its own right.

Even something as mundane and purely functional as a launch lug.

So here is my rendition of the 'little paper tube' done up in Grand Victorian style.

I scrawled out a sketch of what the lugs will look like:


The stock Protostar kit supplies a single 2 inch length of 3/16" launch lug that the instructions say to cut in half, but the Steampunk version needs a little more than this, so I had to raid my parts stash for an additional pair of 2 inch lugs.
 
The first order of business is to apply some CWF to fill the spiral seams on the parts. I don't want the ship's launch lugs to look like big cardboard mailing tubes!
 
A 3/16" dowel is useful for holding the lugs during sanding.


The two lugs will each be 40mm in length, so 10mm needs to be carefully cut off.  This is done by inserting the dowel as a support and making the cut with a hobby knife.  Several rolling rotations of the lug while making light cuts will result in a clean separation.


 The 10mm pieces of lug will serve as mounting bands as shown in the diagram above.  Two additional 10mm lengths need to be cut from the third remaining launch lug.

Next, the four short pieces get a lengthwise cut, again using the dowel as a backing support.


These smaller lugs are then glued on the ends of the main launch lugs making sure the cut edges are in line.

Here is a shot of one of the completed launch lug assemblies.