Wishing all of you a prosperous and blessed year.
Keep on Rocketeering!
Wednesday, January 1, 2020
Thursday, December 12, 2019
Fixing Another Rookie Mistake!
As far as model rocket building goes, I am quite removed from being a rookie. But this doesn't mean that I am immune to making rookie-level blunders. These days, I can merely write off such things as being the result of 'Senior Moments'.
The latest foible involves the construction of a simple little 4FNC side project, an EAC Viper clone. This build is more of a sanity-preserving diversion from the highly detailed Protostar model, still in progress.
Anyway, after having constructed and installed the Viper's motor mount and main fins, I embarked on sweeping up the shop floor, when I found this...

"Wait a minnit...Isn't this the engine block I cut out for....."
A quick peek down the Viper's body tube confirmed it. I had overlooked gluing this essential piece into the motor mount assembly!
If left as is, it would be a matter of one or two flights before the engine hook would trash the front end of the motor mount tube and start causing problems.
"Ed, you perennial head-of-knuckle!"
What now? There are three options to dealing with this: scrub the build and start anew, complete the construction and take the unfinished, unpainted model out to the park for it's one and only flight, or attempt an after-the-fact fix.
I chose the latter.
The best thing to do next was to step away from the project and think on how to go about correcting the error.
The first choice that came to mind would involve cutting the body tube apart just ahead of the motor mount, gluing in the pesky engine block, and rejoining the tube using a stage coupler.
"Nahhh, there's gotta be a better way. "
After mulling the problem over, downing a can of Mountain Dew, and rummaging around the shop, I came up with a solution that just might work.
It just so happens that a 3/8 diameter dowel fits nicely inside a mini engine casing from which the stray engine block is cut.
Sanding a bevel into one end of the block will ensure that the piece has a better chance of inserting into the motor mount tube deep within the rocket body.
With the block mounted on the dowel end, glue is applied to the front and sides of the part.

The dowel and engine block are lowered inside the body tube with care being taken not to touch and smear glue on the inside surface.
Once the part makes contact with the engine mount tube, I can carefully turn the model around for sighting through the aft end of the motor mount.
Now that I can see the block, it is only a matter of carefully maneuvering it into the tube.
Success!
Now, I must work fast before the block sets in this position.
Sliding a BT-5 body tube over the dowel, I use it to hold the block in position while disengaging and removing the dowel.
Next, one of my painting wands equipped with a mini engine casing is inserted into the body tube and used to push the engine block home against the engine hook.

PHEW! SUCCESS!!
I don't have to trash the EAC Viper, and can complete the build.
Now where in the heck did that launch lug get off to?....
Saturday, November 30, 2019
Bar Fleet #124 - Solo
Source: Estes Industries
Kit # EST7288
Type: Glider Sport Model

Stages: Single
Engine Type: 18mm
Recovery: Parachute, Glider
Booster Length: 55.5cm
Diameter: 354m
Glider Length: 15cm
Glider Diameter: 83mm
Overall Length: 62cm
Weight Empty: 84.6g
Nose Cone: Tangent Ogive
Fin Type: Swept
Number of Fins: 4 plus Ring Glider
Color Scheme: Dark Blue, Yellow
Green Trim
Date Completed: 26 November, 2019
A Unique Glider Model
Being a professed aficionado of any model that goes up under rocket power and glides back down, adding an Estes Solo kit to the fleet is a no-brainer.
The Solo is one of the new kits that Estes markets exclusively through Hobby Lobby stores. The model features a plastic fin and motor mount assembly, pre-finished body tube, and a very interesting plastic and card stock ring glider.
Touted as a beginner’s level build, the model goes together very quickly with the use of plastic model cement.
The bird took only an hour on the workbench, including substituting the rubber shock cord with a fiber elastic version, and the application of some fleet number decals.
 |
| A new Solo kit - fresh from Hobby Lobby |
 |
Da parts.....

And the glider.
|
Thursday, November 21, 2019
A Nifty Technique For Precision Marking
Since I am now seriously back in the swing of working on the Steampunk Protostar build, I noted that, while marking out new riveted panels, I was utilizing a technique that I would like to share with you blog readers.
Anyone who is familiar with old-school, hand mechanical drafting would probably know this one. In this day and age, however, with all the available forms of CAD software, this technique has gone the way of the rotary dial telephone.
The idea is simple: maintaining a very sharp tip on your marking pencil.
By keeping a sheet of fine grit sandpaper on the workbench, one can stop frequently during marking operations to sand a sharp chisel tip into the pencil lead.

This has two benefits:
First, the sharpened tip can produce an extremely thin, precise mark or line. This is highly useful to those who build scale models, where utmost precision is required.
Second, the chisel tip can be butted up extremely tight into the right angle formed by the part surface and straight-edge. No pencil-lead width errors are introduced that might throw off a precision measured line.
This technique can be used with normal mechanical pencils using #2 lead. They just have to be sharpened more often.
Harder leads such as number 4 or 5 are better, as they will hold a sharp edge longer, though producing a lighter line.

Monday, November 18, 2019
Steampunk Protostar, Part 32 - "A Little More Air, Please!"
The backyard deck build is finally finished!
Phew, what a ride....
Attention can now turn back to model rocketry, the long running Protostar build in particular.
This weekend saw the completion of an external air scoop for this "Ship of Fancy"
The build was very simple, with the scoop parts being cut from 1/16 balsa.

Another curved balsa mounting plate similar to the one used on the launch lugs and smoke vent assemblies.

An application of glue dot rivets...

And a couple coats of flat aluminum paint.

Done!
Stay tuned for yet more 'riveting' action!
Phew, what a ride....
Attention can now turn back to model rocketry, the long running Protostar build in particular.
This weekend saw the completion of an external air scoop for this "Ship of Fancy"
The build was very simple, with the scoop parts being cut from 1/16 balsa.


An application of glue dot rivets...

And a couple coats of flat aluminum paint.

Done!
Stay tuned for yet more 'riveting' action!
Monday, October 7, 2019
What's Up With The Lack Of Posts?
Hi, folks,
You probably have noticed a drop in the number of posts here recently.
This is because I have embarked on a major deck and roof cover project at my home, which, of course, is taking up a substantial amount of my so-called 'free time'.
I haven't even found time to work on model rocket building.
I hope to be wrapping up the construction work before the snow flies, so I can return to rocketry soon.
Keep checking in....
Sunday, September 15, 2019
A Successful Keychain Cam Flight
A little over a week ago, on September 6th, I flew a Quest Big Rage with an 808 keychain video camera strapped to the payload section. This marked the first time since 1981 that I flew a model rocket with any kind of a camera attached to it, that being an Estes Cineroc.
This flight went very well, but when I got the camera home, and the video transferred to the PC, I found that neither of the two installed media player software packages I had would work right. One would stop video after five seconds, but continue with the audio. The other would play the video correctly, but when I wanted to pause and capture a single frame, the image would go black.
Yesterday, I found a good media player package download that claimed it would take care of any format...and it worked.
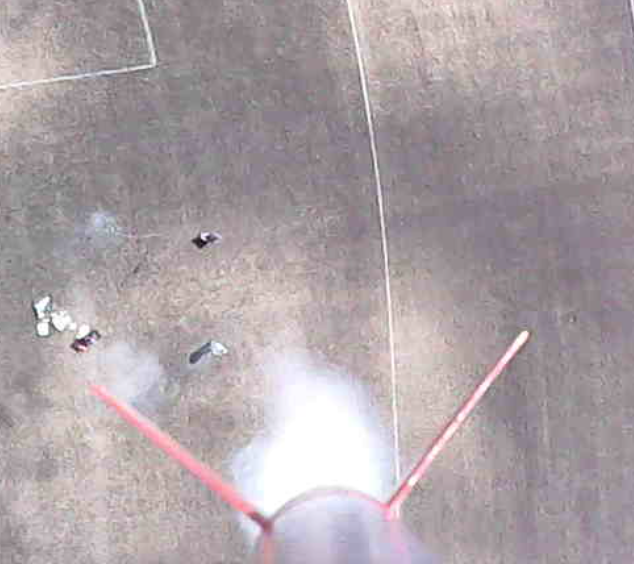
So, here are some still pics of the flight:
Shortly after liftoff.
Up until now, I have been taking photos of my model rockets. This time, the rocket took a picture of me!

Several still frames of the flight.....


During the wild recovery under the parachute, the camera caught this single frame image of the booster section....

Now, I need to get to work on coming up with a stable parachute recovery system that will allow the camera to point groundward, and minimize payload spinning.
Future plans for camera projects include getting the keychain successfully adapted to boost glider flight.
Subscribe to:
Posts (Atom)