Last night I happened to be perusing through my collection of Model Rocketry Magazine issues, looking for some rocket plans I had recalled seeing.
I happened upon the October 1969 issue which contained the results write-up about NARAM-11 held at the U.S. Air Force Academy in August of that same year. It diverted my attention away from the plans search for awhile.
The article described some difficulties surrounding the tracking scopes used on the first day of competition, citing that the scopes were magnified 6x with a 90 degree elbow in the optics path. Folks manning these scopes found them very difficult to use in following models in flight, and, as a result, no tracks closed.
These scopes had been provided by the Colorado Springs Peak City Section, who were co-hosting the NARAM, with Bill Roe serving as the CD of the contest. Luckily, the article went on to say, the next day's tracking events were saved by the Annapolis section, who had brought along their through-sight tracking scopes, which were much easier to use.
Fast forward to 1973.
Shortly after my rocket buddy, Marc K., and I had joined a newly formed local Colorado Springs rocket club - Skywatchers / ROMAR NAR section, we were paid a visit by Mr. Roe himself.
Bill generously donated to our fledgling club all of the model rocket range equipment that had belonged to the former Peak City Section. This included multi-pad launch racks, P.A. system, communications system, and....a pair of tracking theodolites.
Subsequently, at one of our sport launches, the scopes were brought out, set up, and made available to anyone who wished to learn and practice the fine art of tracking model rockets. Of course, I was eager to try my eye at it.
I seem to remember that the scope I attempted to use was magnified...and it did have a 90 degree elbow in the optics. And it was impossible to keep even the largest and slowest of model rockets in the field of view!
I am fully convinced that these are the exact same scopes that were used on that first day of flying at NARAM four years earlier.
If so, I can fully understand the frustration of the trackers, contestants, and meet officials as they experienced such a dismal rate of track closures.
Sometime in the late 1970's, the size of the Skywatchers/Romar club diminished to only four or five regular members, so we started flying from a single launch pad that was equipped with a 1/8"rod, a 3/16" rod and an adjustable tower. Others would bring their own personal launch pads. The old multi-pad racks were still brought out and used at public demo launches on occasion.
The rest of the Peak City equipment went into storage in someone's garage, and I never saw those tracking theodolites again.
It would be interesting to know whatever became of those historic beasties.....
Wednesday, April 18, 2018

Monday, April 16, 2018
A Productive...and Frustrating Weekend
This past weekend was a good one in the BlastFromThePast rocket lab.
I managed to make significant progress on a build of an Orbital Transport. I think that this model is hands down my favorite of all Estes kit offerings, past and present.
Progress on the model included getting the engine mount assembled and installed, marking the main booster tube, assembling the ram-air tubes, and cutting out the million-and-a-half required balsa parts.
I am one piece short - one of the forward booster wing fairings. I simply ran out of available 3/32 balsa stock of sufficient length to fit in this final long component. Need to get to Home Depot to pick up another sheet. Why Home Depot? Because I have consistently been finding nice pieces of C-grain in their stock. Perfect for me, since there are some upcoming glider projects on my schedule, and I prefer using C-grain for glider wings.
Another model that saw some work was my new Canopus-2 (not the Argentine sounding rocket) cluster bird. This one is my own design from 1975. More details on it later.
Anyway, I finished attaching and filleting the fins, so the model is now ready for grain filling.
So, how have I managed to find the time to get all this accomplished with my hectic weekly schedule?
Easy.
I built a nifty little lap work bench surface that I can bring up to the living room and work on rockets in the evening, rather than burying myself in solitude in the basement workshop. In this way I can hang out with Mrs. BlastFromThePast, watch some movies, or listen to music, and still build rockets. Naturally, processes like sanding, sealing, and painting are 'verboten' in the living room and still need to be confined to the main shop, but all of the parts measuring, cutting, assembly gluing, and decaling is fair game.
One other project I managed to fit in was getting a start on building a half dozen more rocket display stands. These are made in the woodshop using vintage woodworking hand tools. I completed sawing the bases to length, planing the 45 degree bevel, and center marking the pieces for boring the holes. I have a previous post on this whole process, if you should care to look.
Now for the 'Frustration' part....
There's an old adage about Colorado:
"There is no wind in Colorado - Kansas just sucks!" (My apologies to any Kansas readers)
It seems that the wind has been blowing non-stop here in Castle Rock since the beginning of February.
All during the weekend, I wistfully made periodic checks to assess wind conditions. From my upper bedroom window I can see a U.S. flag on a pole a couple of blocks away. All weekend, this flag was proudly standing horizontally. Sigh.....
I am anxious to get some models out to be painted, but to no avail. Currently in the painting queue are the three parts of the Lunar Patrol all ready for color coats, an Astron Alpha awaiting primer, and a Satellite Interceptor also awaiting primer. It will only be a short matter of time until the Canopus-2 and Orbital Transport will also be on the 'Awaiting Paint' shelf. Sigh.....
Also, I have been itching to get out and do some rocket flying. Wind's blowing.
Sigh..........
I managed to make significant progress on a build of an Orbital Transport. I think that this model is hands down my favorite of all Estes kit offerings, past and present.
Progress on the model included getting the engine mount assembled and installed, marking the main booster tube, assembling the ram-air tubes, and cutting out the million-and-a-half required balsa parts.
I am one piece short - one of the forward booster wing fairings. I simply ran out of available 3/32 balsa stock of sufficient length to fit in this final long component. Need to get to Home Depot to pick up another sheet. Why Home Depot? Because I have consistently been finding nice pieces of C-grain in their stock. Perfect for me, since there are some upcoming glider projects on my schedule, and I prefer using C-grain for glider wings.
Another model that saw some work was my new Canopus-2 (not the Argentine sounding rocket) cluster bird. This one is my own design from 1975. More details on it later.
Anyway, I finished attaching and filleting the fins, so the model is now ready for grain filling.
So, how have I managed to find the time to get all this accomplished with my hectic weekly schedule?
Easy.
I built a nifty little lap work bench surface that I can bring up to the living room and work on rockets in the evening, rather than burying myself in solitude in the basement workshop. In this way I can hang out with Mrs. BlastFromThePast, watch some movies, or listen to music, and still build rockets. Naturally, processes like sanding, sealing, and painting are 'verboten' in the living room and still need to be confined to the main shop, but all of the parts measuring, cutting, assembly gluing, and decaling is fair game.
One other project I managed to fit in was getting a start on building a half dozen more rocket display stands. These are made in the woodshop using vintage woodworking hand tools. I completed sawing the bases to length, planing the 45 degree bevel, and center marking the pieces for boring the holes. I have a previous post on this whole process, if you should care to look.
Now for the 'Frustration' part....
There's an old adage about Colorado:
"There is no wind in Colorado - Kansas just sucks!" (My apologies to any Kansas readers)
It seems that the wind has been blowing non-stop here in Castle Rock since the beginning of February.
All during the weekend, I wistfully made periodic checks to assess wind conditions. From my upper bedroom window I can see a U.S. flag on a pole a couple of blocks away. All weekend, this flag was proudly standing horizontally. Sigh.....
I am anxious to get some models out to be painted, but to no avail. Currently in the painting queue are the three parts of the Lunar Patrol all ready for color coats, an Astron Alpha awaiting primer, and a Satellite Interceptor also awaiting primer. It will only be a short matter of time until the Canopus-2 and Orbital Transport will also be on the 'Awaiting Paint' shelf. Sigh.....
Also, I have been itching to get out and do some rocket flying. Wind's blowing.
Sigh..........
Wednesday, April 11, 2018
BAR Fleet #112 Star Seeker
 Estes Industries
One of three models in the
Mini-Tri-Pack
Type: Futuristic / Sci-Fi
Recovery: Featherweight /
Streamer
Length: 188mm (7.4”)
Diameter: 13.74mm (.541”)
Weight Empty: 7.7g (.27oz.)
Nose Cone: Tangent Ogive
Fin Type: Compound
Number of Fins: 2 compound assemblies
Color Scheme: White with dark blue and
red trim.
Date Completed: 11 April, 2018

For such a small model rocket, the Star Seeker is loaded
with details and a very well-designed decal scheme. It has the appearance of a near-space
‘commuter’ transport, complete with crew cockpit and passenger doors/windows. A nice little addition is the ‘Boeing’ logo
included in the decal set.
At one point, the constructed, painted model was victim
of a large notebook titled ‘The Big Book of Rocket Science’, which toppled over
and proceeded to break off one of the complete fin assemblies. Had to re-glue and re-paint….but the Star
Seeker went back to its perennial space on the shelf.
In mid-2017, I grew weary of looking at that unfinished
bird, so down it came to see if there was some way to fashion the markings
without resorting to springing substantial dollars to have them made commercially.
As for how to go about applying the model markings, I had
toyed with the idea of cutting each detail component out of either existing
stripe waterslide decal material or adhesive trim Monokote. This never came to pass.
I also attempted to attach templates of the markings to
the model and carefully draw them on with fine tipped Sharpie markers. This would have worked reasonably well, but I
didn’t get the cockpit windows and passenger doors lined up very well. It might have passed OK, but I was not satisfied
with it, being somewhat of a grumpy ol’ perfectionist. Out came the sandpaper
and spray paint to render a do-over on the nose cone!
Next, I tried using a Dymo label printer to fashion a
close facsimile of the ’Boeing’ logo.
This didn’t work well either as the labels were too stiff to adhere
properly to the small diameter detail tube.
At this point, I once more gave up on the model and set
it aside.
Things changed recently, however, when I upgraded my
computer system to include a nice HP ink-jet printer. I have now learned the fine art of producing
home-print decals, and the Star Seeker is one of the first models in the fleet
to benefit from the same.

Once the downloaded decal sheet for the Estes Mini
Tri-Pak was sized and printed out on blank decal stock, the fun began. Star Seeker was suddenly finished in the
space of a single evening, after having sat idle for almost two years!
The bird is now an attractive and welcome addition to the
fleet. I am looking forward to seeing if
it flies as good as it looks.

One other small deviation from the original is the recovery system. I have read on some of the forums that Star Seeker fins are highly likely to break using only featherweight recovery. I opted to install a small streamer in my model.
Thursday, April 5, 2018
Back In The Day, Part #10: Launching Model Rockets From A Broom Closet!
It all began when the Skywatchers/ROMAR rocket club of Colorado Springs, Colorado got a call from Houtz’ Drug Store in Limon, Colorado. They had just started carrying Estes model rockets in the hobby section of their store, and decided it would be nice to host a demonstration launch by someone who was experienced with flying model rockets.
The club gleefully accepted the invitation.
On the appointed day, half a dozen stalwart members of
ROMAR, including myself, loaded up two vehicles with the club launch rack,
P.A., range boxes, and a bunch of rockets, and hit the road for the wide open
plains of eastern Colorado.
Now, friends, we would have thought that a model rocket
launch at a small rural town would have meant flying from a spacious, open
field with unobstructed views to the four horizons. We were thinking F-engine country, here!Instead, upon arriving in town, and speaking with the drug store owner, we learned that our designated launch site was to be the parking lot adjacent to the business’ building, right smack-dab in the middle of downtown Limon!
We’re talking a very small asphalt-covered space with maybe
50 feet on the longest dimension, surrounded by three story buildings, tall
trees, and plenty of power lines.
Hmmm….It was quite obvious that our hosts were unaware of the altitude capabilities of even the smallest of model rockets.
We huddled and held an impromptu meeting to decide whether
we wanted to try this or not.
“Yeah, why not? We
traveled all the way out here! We don’t
want to chicken out and dis-appoint our kind hosts!”
So, we bravely went about setting up the range equipment,
the display table, and prepping the models that were to fly that day.
Once all was in readiness, our LCO conducted a test of the
launch system.
Dead as a doornail.
What else could go wrong? By now, a substantial number of spectators had
shown up to see the demo.
As the equipment team scrambled to troubleshoot and repair
the system, one of our members engaged
the crowd with a lengthy description of what model rocketry was all about, and
demonstrated prepping a model.
Finally, we got the word that the launch system was
operational. Huge sighs of relief!
As the rack was being loaded, I started things off with the
first flight of the day – my Cold Power Convertible Yankee 5. Since it was a warm Colorado day, the model
lifted off and flew quite high. The best
part is that it was successfully recovered.
We managed to fly about two dozen models over the course of
the demo. Most of them were recovered, thanks
to the owner of Houtz Drugs, who had stationed some of his employees and other
townsfolks volunteers on the rooftops of several nearby buildings. A few models were still lost, nonetheless.
I had taken along a few birds from my personal fleet to fly
in this demo:Astron Spaceman – this one flew nicely and landed on top of the local theater building. It was retrieved by a kind gentleman who was stationed at that location. The Spaceman did, however, sustain a broken balsa brace piece.
Estes Starblazer (The old K version with curved fins and
carved canopy) - This model turned in a very nice flight, but was never found. I was somewhat sad at the loss because it was
my second ever rocket build.
Skeeter Eeter – This one was my BT-60 upscale of the Estes
Mosquito, powered by a D engine. It was
the only model flight of the day flown with a larger impulse engine. I had a little trepidation about flying this
one, but went ahead anyway. A real cloud
pleaser, it was, achieving a very respectable altitude. Unfortunately, it too, was lost, despite
descending in sight on a large streamer.
Despite the flying conditions and loss of some models, our
demo drew a good sized crowd, and can be classified as a success.
On the drive back to Colorado Springs, one of the club
members made the comment:“That’s the first time I’ve ever flown rockets out of a broom closet!”
Addendum: After submitting this post on the old version of this blog, I managed to get in email contact with the owner of the drug store in Limon. It is no longer Houtz Drugs, but is still in business as Howard’s Drugs. The gentleman remembered this rocket demonstration event from so long ago, and said that it sparked some interest among some of the townsfolk, who afterward purchased rockets and flew them in and around Limon.
-Ed
Wednesday, April 4, 2018
MPC Lunar Patrol: Part 13 - An Engine Hook Retro-Fit.
The build of this version of the Lunar Patrol was
originally intended to employ friction fitting of the engine for flight. Since
the model is not an exact replica of the original kit, I had mulled over a way
to attach a standard engine hook, but it would have to be external to the body
tube with some sort of retainer/covering. Not an ideal solution, either
functionally or aesthetically.
I had pretty much resigned to sticking with the friction fit method, which would be somewhat of a pain out on the flying field, since the engine is well recessed between the two side tubes. Inserting and removing the engine casing would be difficult at best.
This scenario changed when I found this while rummaging through a tool drawer in the garage…

This is an extra-length small diameter twist drill bit I had purchased for some long-ago electronics project.
I immediately recognized this as a solution to the Lunar Patrol engine hook dilemma.
The idea is to use the internal music wire hook method about which I posted a short time ago. With this new-found drill bit, I could reach inside the aft end of the rocket body tube, poke a small hole through the engine block right next to the inner tube wall, and insert the music wire down through the top of tube.
With the bit chucked into a standard electric drill, I carefully inserted it into the tube. Keeping the bit carefully aligned against the tube wall, I felt it butt up against the engine block. I had to be very careful that I did not mis-align the bit so that it would not drill through the side of the body tube, or pass crookedly through the engine block. Drilling very slowly, I felt the bit pop through the block.
Sighting down the inside of the body tube, I could see a neat little hole in the engine block in the exact location I wanted it.
Eureka!
Now it was only a matter of forming a hook on the top end of the long piece of music wire to fit over the engine block, and fishing the wire down the tube to insert in the newly drilled hole.
 Once all was in position, I applied a drop of
CA to the hook and let the wire drop into position by gravity. Easy-Peasy!
Once all was in position, I applied a drop of
CA to the hook and let the wire drop into position by gravity. Easy-Peasy!

 Once the CA had cured and the wire was secure, I inserted
an engine casing into the model, bent the wire over the end of the casing, and
cut to proper length.
Once the CA had cured and the wire was secure, I inserted
an engine casing into the model, bent the wire over the end of the casing, and
cut to proper length.

 Instant retro-fit engine hook! I did notice in one of the above pics that there are some new dents and dings on one of the fins. These will have to be filled before painting.
The right tools and a little engineering work ultimately resulted in a pretty nifty solution to a sticky problem.
Now, I will have to get busy and perform this identical bit of ‘rocket surgery’ on the Star Trooper and Mini-Maggot pop pod, both of which I’ve had perennial problems with friction fit engines ejecting……
I had pretty much resigned to sticking with the friction fit method, which would be somewhat of a pain out on the flying field, since the engine is well recessed between the two side tubes. Inserting and removing the engine casing would be difficult at best.
This scenario changed when I found this while rummaging through a tool drawer in the garage…

This is an extra-length small diameter twist drill bit I had purchased for some long-ago electronics project.
I immediately recognized this as a solution to the Lunar Patrol engine hook dilemma.
The idea is to use the internal music wire hook method about which I posted a short time ago. With this new-found drill bit, I could reach inside the aft end of the rocket body tube, poke a small hole through the engine block right next to the inner tube wall, and insert the music wire down through the top of tube.
With the bit chucked into a standard electric drill, I carefully inserted it into the tube. Keeping the bit carefully aligned against the tube wall, I felt it butt up against the engine block. I had to be very careful that I did not mis-align the bit so that it would not drill through the side of the body tube, or pass crookedly through the engine block. Drilling very slowly, I felt the bit pop through the block.
Sighting down the inside of the body tube, I could see a neat little hole in the engine block in the exact location I wanted it.
Eureka!
Now it was only a matter of forming a hook on the top end of the long piece of music wire to fit over the engine block, and fishing the wire down the tube to insert in the newly drilled hole.
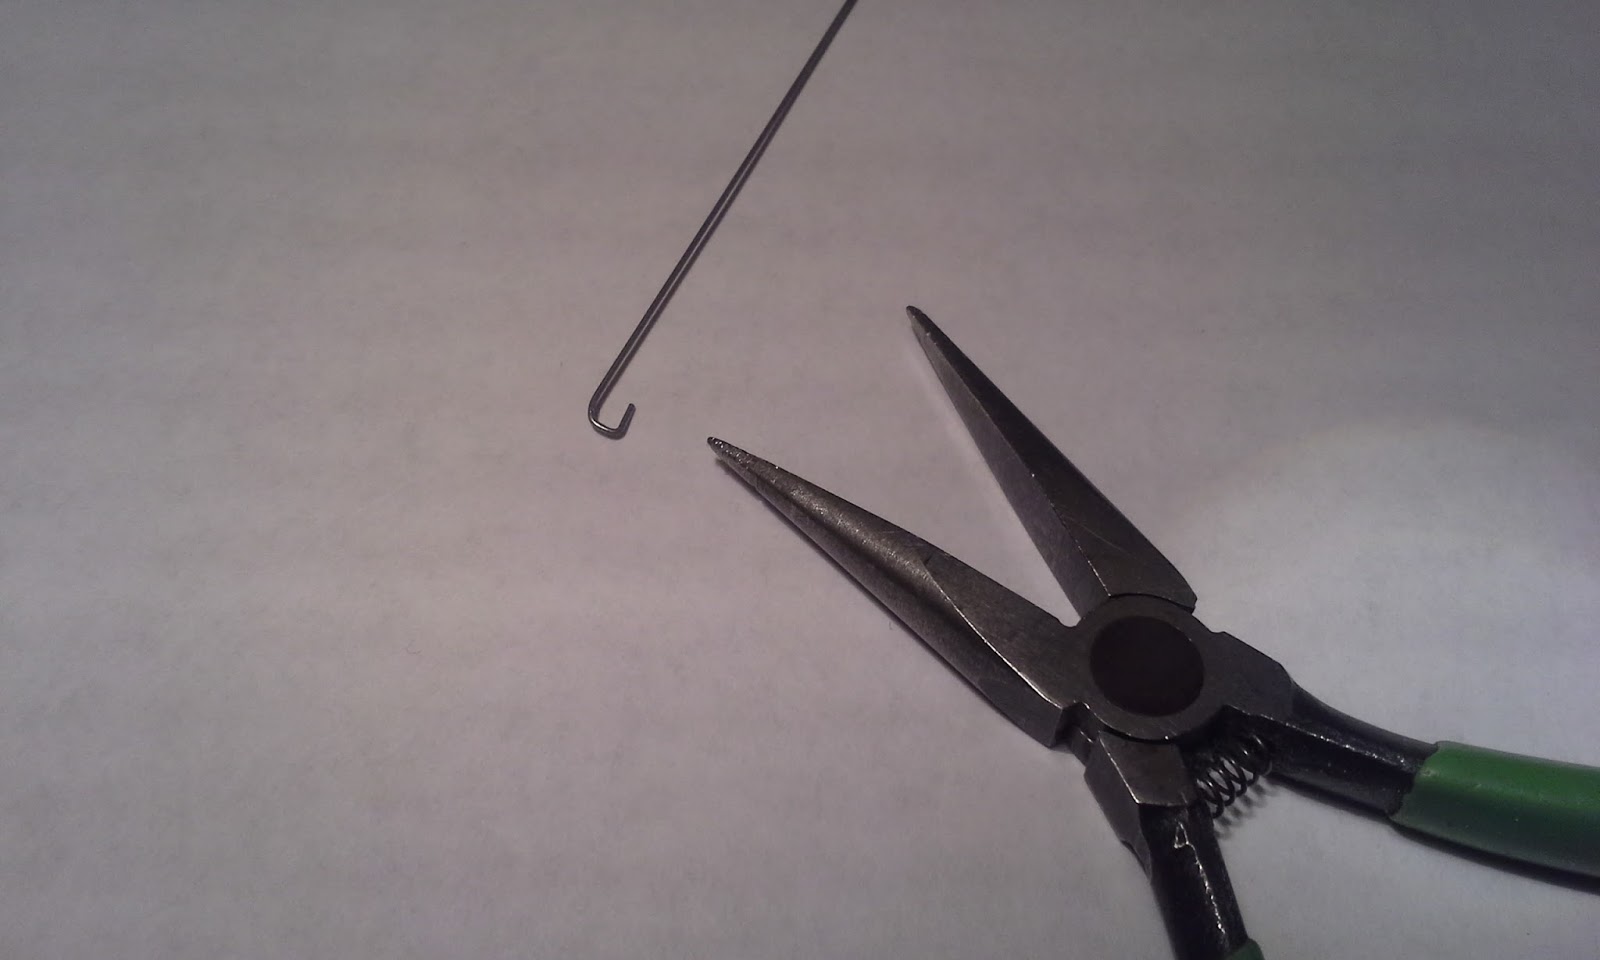


The right tools and a little engineering work ultimately resulted in a pretty nifty solution to a sticky problem.
Now, I will have to get busy and perform this identical bit of ‘rocket surgery’ on the Star Trooper and Mini-Maggot pop pod, both of which I’ve had perennial problems with friction fit engines ejecting……
Tuesday, April 3, 2018
Model Rocket Build Progress Over Easter Weekend.
This weekend, I had a series of short blocks of time to
get into the shop and make progress on some model rocketry projects.


Also, the wind conditions in the back yard were such that
I was finally able to get out and perform a small amount of spray painting.
The first project was to get some clear coat on the decal
sheet I made up the week before. To help
with this, I cobbled together a handy little sheet holding device out of a
piece of card board, a paint stir stick (what else?), duct tape (what else?),
and some paper clips.


Next up, the newly constructed Estes Astron Alpha
received its first primer coat. I had
just enough Duplicolor gray to cover the entire model before the can ran
out.
Must get to the nearby auto supply
store.

Moving on, I completed construction of the Satellite
Interceptor build by attaching the launch lug and spot filling left-over small grain
and gaps. This model is now ready for
primer, as well.

The Lunar Patrol model got pulled off the shelf for one
final touch. I’ll detail this in the
next installment of that long-running build post series.
Finally, I applied CWF to the seams of a BT-50 body tube purloined
from a Comanche 3 kit that I bought a couple weeks ago for parts. This tube is
ear-marked as the booster airframe of a new Orbital Transport build.
In between the rocket work, I also managed to do a small
production run on a new set of shop-made sanding blocks. I will also expound on these in a near-future
post.
The rest of the weekend was pretty much spent in other
important activities, such as playing electric violin in the church praise band
for three back-to-back Easter Sunday services. Most of the songs played were high-energy,
up-beat rockers. Phew! Including early morning rehearsal, that was a
6 ½ hour day at church!
A large chunk of the weekend was devoted to hanging out
with the grand-kiddoes (a.k.a. future model rocketeers!) – feeding and helping
take care of the 3 week old, and participating in an epic basement-wide
Nerf-gun battle with the 9 and 7 year-olds.
Sheesh – give me a few model rockets, a Nerf gun, or a
pile of Lego, and I become a kid again!
Cheers.
Monday, March 26, 2018
Busy Weekend In The BlastFromThePast Rocket Laboratory
Greetings, Blog Followers
This past weekend I finally was given a substantial block of time to get into the shop and actually work on some rocketry projects.
First item on the agenda was to drive up to Lone Tree from Castle Rock to stop in at the Hobby Town store. There I finally picked a Little Joe II kit for which I had been saving pocket change in a coffee mug throughout the past year . While there, I picked up one each of the Estes PNC-20 and PNC-5 nose cone packs. These fulfill nose cone requirements for several of the model rocket builds currently on the bench. I'm actually taking the 'lazy man's' way out with these as the original intent had been to turn balsa cones for these models on the lathe. The plastic cones will save me a lot of time in the interest of actually getting some rockets built.
Also acquired at the hobby store was a packet of blank clear decal material.
Once I got home, out came the lap-top. After a couple of hours jimmying around with downloading decal patterns, designing custom decal patterns, attaching them all to a word document, adjusting sizes to fit the intended models, and making B&W test copies, I was ultimately able to produce a good decal sheet covering five of my current build projects.
I had hoped to get some Krylon clear seal on the decal sheet, but the excessive ambient airflow velocity of the vehicle finishing facility (wind in the back yard) was such that any spray painting was rendered out of the question. This has been a problem throughout most of February and March. All of the calm days have been too cold, and all of the warm days have been overly windy.
Frustrating, this.
I've had the Lunar Patrol model all prepped for painting all this time, but never the right conditions for spray painting. Serious consideration is going into perhaps building an indoor spray booth. The weather conditions have also prevented any hopes of getting out for a rocket launch during the past two-month span. Sigh....
Next up on the 'tuh-doo' list was to break out the container of CWF and fill seams on the multitude of body tubes for no less than six rocket projects. I see much sanding in the near future.
While puttering around in the shop, I managed to perform pretty much a complete build of an Astron Alpha. Early this morning, I got up and did final grain-fill sanding on the fins, and attached the launch lug. All that is left is applying a glue fillet to the lug, then the model goes into the painting queue to await its first coat of primer.
I also made substantial progress on grain filling and sanding the many balsa fins on the Satellite Interceptor. This one should also be primer-ready by the end of the week.
Yet another project was to fashion a 500g weight to calibrate a Magnum digital scale I acquired back in February. The weight consisted of a glass baby food jar filled with enough nickels and a few paper clips to exactly equal 500 g.
Now I can weigh my models in style!
As a final touch to the Model Rocketry Weekend, I was able to fashion a new dowel 'antenna' for the tail fin on the Lynx model. This piece had been lost on its last flight.
Phew! I'm ready to go back to my regular job this morning for a little R & R....
Cheers!
This past weekend I finally was given a substantial block of time to get into the shop and actually work on some rocketry projects.
First item on the agenda was to drive up to Lone Tree from Castle Rock to stop in at the Hobby Town store. There I finally picked a Little Joe II kit for which I had been saving pocket change in a coffee mug throughout the past year . While there, I picked up one each of the Estes PNC-20 and PNC-5 nose cone packs. These fulfill nose cone requirements for several of the model rocket builds currently on the bench. I'm actually taking the 'lazy man's' way out with these as the original intent had been to turn balsa cones for these models on the lathe. The plastic cones will save me a lot of time in the interest of actually getting some rockets built.
Also acquired at the hobby store was a packet of blank clear decal material.
Once I got home, out came the lap-top. After a couple of hours jimmying around with downloading decal patterns, designing custom decal patterns, attaching them all to a word document, adjusting sizes to fit the intended models, and making B&W test copies, I was ultimately able to produce a good decal sheet covering five of my current build projects.
I had hoped to get some Krylon clear seal on the decal sheet, but the excessive ambient airflow velocity of the vehicle finishing facility (wind in the back yard) was such that any spray painting was rendered out of the question. This has been a problem throughout most of February and March. All of the calm days have been too cold, and all of the warm days have been overly windy.
Frustrating, this.
I've had the Lunar Patrol model all prepped for painting all this time, but never the right conditions for spray painting. Serious consideration is going into perhaps building an indoor spray booth. The weather conditions have also prevented any hopes of getting out for a rocket launch during the past two-month span. Sigh....
Next up on the 'tuh-doo' list was to break out the container of CWF and fill seams on the multitude of body tubes for no less than six rocket projects. I see much sanding in the near future.
While puttering around in the shop, I managed to perform pretty much a complete build of an Astron Alpha. Early this morning, I got up and did final grain-fill sanding on the fins, and attached the launch lug. All that is left is applying a glue fillet to the lug, then the model goes into the painting queue to await its first coat of primer.
I also made substantial progress on grain filling and sanding the many balsa fins on the Satellite Interceptor. This one should also be primer-ready by the end of the week.
Yet another project was to fashion a 500g weight to calibrate a Magnum digital scale I acquired back in February. The weight consisted of a glass baby food jar filled with enough nickels and a few paper clips to exactly equal 500 g.
Now I can weigh my models in style!
As a final touch to the Model Rocketry Weekend, I was able to fashion a new dowel 'antenna' for the tail fin on the Lynx model. This piece had been lost on its last flight.
Phew! I'm ready to go back to my regular job this morning for a little R & R....
Cheers!
Subscribe to:
Posts (Atom)