Thursday, August 30, 2018

FlatCat Boost/Glider Build, Part 14 - Pop Pod Painting Party

Today is the day to apply the color coats to the FlatCat's pop-pod.

I'm continuing on with the yellow/orange/red motif used on the glider.

At first, the thought had been to mask off each color area to make straight section demarcations, but I decided to go with the color-fade effect instead.  I think it looks cooler, plus it won't take any time at all to do, since there won't be any measuring and masking.

First the YELLOW.....


ORANGE....

….and RED


Now, it's on to final marking, sealing, and installing the recovery system...


Tuesday, August 28, 2018

Whatever Shall I Do With All These Tubes?

Over the past couple of weeks at my workplace, I have been unpacking and installing a lot of small air system regulators.  Each one comes with a couple of short cardboard tubes protecting the ends of the units.  I've accumulated bunches of the things.


I'm thinking some sort of knock-together scratch-built ring-finned model rocket.

Also, the smaller diameter tubes look like they just might be a slip fit over a BT-50 tube.  Lots of possibilities there, too.

Must don my tin-foil, imaginative-thinking, odd-ball-model-rocket-designing headgear.....

Monday, August 27, 2018

FlatCat Boost/Glider Build, Part 13 - Pop-Pod Prime-Time

I didn't have very much time this past weekend to do a lot of rocket building work, but I did manage to get the primer coats and sanding finished on the FlatCat's pop pod. 

The 'Piece X', of course, is masked off so there is not paint build-up that would interfere with its fit in the glider nose slot.


All that remains with this build is applying the pod's color coats, markings, and seal finish, followed by the installation of the recovery system and trim balancing for boost stability.

Cheers.

Friday, August 24, 2018

"How Many Rockets Do You Need, Anyway??"

This is a question that is often asked of model rocketeers by persons who are casual observers of the hobby and haven't ever been bitten by the rocket bug. 

"Wouldn't just one rocket suffice?"
 " Do you need so many?"

Answers:
"No!"
"Yes!"

This whole thing can be summed up with a simple math equation:

If X equals the number of models a rocketeer wishes to have, or has to have to complete his/her collection,
and N equals the number of rockets currently in that collection, then

X=N+1


Cheers!


Thursday, August 23, 2018

FlatCat Boost/Glider Build, Part 12 - FlatCat For Lunch...Yummmm!

Right across the street from my workplace in Highlands Ranch, Colorado, is a nice, large public park with a decent expanse of grassy area.  Appropriately, for a model rocketeer, the place is named 'Redstone Park'. 

Unfortunately, park regulations prohibit the flying of model rockets there, but I can still use it as a place to hand launch and trim boost/gliders.

So, I brought the FlatCat B/G to work to keep here in order to take advantage of a lunch hour this week during which there would be minimal wind activity.  It only takes two minutes to pop over to the park and start flinging gliders around!

Last Monday, Aug. 20th, I made an attempt to trim the FlatCat glider at the park during my lunch break. 

I managed to get in a half dozen test throws before some session-ending winds picked up due to a thunderstorm that was building in the foothills to the west.  Blasted storm!

By the time I made the final toss, I had the FlatCat trim balanced to glide fairly well.

On the last test flight, I heaved it into the wind.  The model climbed to an estimated 40 foot altitude, aided by the wind, turned, and settled into a nice glide that described a wide turn to the right.  This hand-launched flight went for well over 25 seconds, and I ended up chasing it over half the length of the field!

Today, I took the glider back out to the field again.  Wind speeds ranged from 0 - 5 mph, so it was a perfect time to perform trim flights.

After getting the model to trim out into a flat glide pattern, I found that I needed to introduce a turn.  The proper amount of clay on the right wingtip took care of this.


Hand launch flights typically lasted from 10 to 15 seconds.

Here are some still shots from a cel phone video I took of one of the flights:


Flattening out... (It's a FlatCat, right?)

 
Gliding......


Still Gliding.....


....And skimming the turf prior to a soft landing!

FlatCat trim test assessment:  IT GLID REAL GOOD!

The only items left with this build is to paint and apply markings to the pop-pod, install the recovery system, and trim the entire model for boost stability.
 
I can hardly wait to get this one out for a powered flight!


Tuesday, August 21, 2018

FlatCat Boost/Glider Build, Part 11 - Oops! I Goofed Up...

Yep, I kinda got a couple things out of order.

I should have applied the silver trim Monokote strips to the wings before drawing the FlatCat logo.


Turns out, the trim covers up part of the design.


Can't fix it now...just have to live with it as is.
Is it just me, or does the cat in the logo seem to have sort of a smirk on its face that says, "You Idiot!"?

Here is the now completed glider, along with a serving of the 'Breakfast of Champions". 


I probably should have drank that before starting on the markings and trim work!

Anyway, my senior moment aside, the model is now ready to take out to a convenient field and work on glide trimming.  As can be seen in the above photos, I've already applied trim clay to set the glide CG at about wing midpoint.

Monday, August 20, 2018

Maiden Flight of the Mark II Rock-A-Chute

For this post, I thought I would back-track a couple of years to November 3rd, 2016, the day of the maiden flight of the Mark II.  This is the same bird I took with me to the NAR Reunion in Pueblo and had on display along with its old-school launcher.

I had actually posted this flight as part of the 'Launch Date' series on the first version of this blog.  I had to take the blog down later that winter, and, unfortunately lost all the posts in the internet 'abyss'.

On this particular date, I had contacted fellow Denver model rocketeer Mike Goss, and we met to conduct a launch session at Dove Valley Park in Arapahoe, Colorado. (A suburb of Denver).

Mike kindly took the following photo of me posing with the Mark II.


I made the decision to post these pictures in black and white since this is a launch of a 1950s model rocket.  I had entertained the idea of arriving at the launch field dressed in 1950s style garb, but I opted out.  I didn't even put any white tape on the corner of my reading glasses I usually wear.

Oh, well ...I'm nerdy enough as it is....

Here is a pre-flight 'glamour' shot of the Mark II on the pad.  The high tech launcher is a block of 2 x 8 wood with a 5/16 diameter wooden dowel launch rod.  The blast deflector is a sheet of roof flashing cut and bent to shape.  Old school as you can get. 


And... Lift off!


A nice straight up flight of a big launch lug with a model rocket attached to it! 

Incidentally, the launch lug on this model is the casing of the very motor used to propel my first BAR-era model rocket flight a couple of months earlier.

The Mark II turned in a very nice flight on an A10 motor, and was recovered via a 15" red plastic square parachute, just the way Orville flew em'.


I had so much fun with the Mark II that I quickly re-prepped and flew it a second time.  Again a perfect flight.

Here's the Mark II in living color:


To date the model has flown 3 times, with plenty more flights to go...

Thursday, August 16, 2018

FlatCat Boost/Glider Build, Part 10 - Decorative Embellishments

To finish off the glider details, I hand drew a rendition of the famous FlatCat logo, along with the model's fleet number and my old NAR number.


Next, it's off to the park to do a little glide trimming....

Wednesday, August 15, 2018

NAR 60 Year Reunion, Part 17 - Wrapping Things Up

Well, boys and girls,

This post pretty much completes the series on the NAR 60th Year Rocketeer Reunion.  I had nearly as much fun writing and putting together this material as I had attending the reunion. I hope you all found it informative and entertaining. 

There were at least 200 NAR model rocketeers present at this event. 

Many old-timers and many newcomers.  Past NAR presidents.  NARAM contest directors.  NARAM champions.  Model Rocketry Royalty.  Hobby innovators. Rocketeers who wrote many articles or were otherwise featured in the pages of Model Rocketry Magazine and the Model Rocketeer during the roaring heyday of the hobby when the Apollo program was the going thing in the late 60s-early 70s.  Model Rocket Manufacturers from companies defunct to new ones to ones that have been in existence from near the very beginning. Fliers of LPR...MPR...HPR.  Sport fliers.  Competition Fliers. Glider Fliers.  Scale Nuts.  Oddroc Fans (won't mention any names, Randall). 

Attendee NAR numbers ranged from 18, (Bob Kaplow) to 105584, (Dave Hutchinson).

A tremendous cross section of people who at some point in their lives got bit really hard by the 'Model Rocketry Bug', and never looked in the rearview mirror.  

The core of the hobby.

As NAR President John Hochheimer pointed out, "This is the last time this same group of people will all be together in the same room representing our great hobby!"

I felt extremely privileged to be there and somewhat in awe of the whole affair.

One last anecdote:

Nearing the closing moments of this highly enjoyable and inspiring event, I caught up with fellow blogger, Hans Chris Michielssen.

"Man, this was great! It's just like being a kid in a candy store!", I said.

"Yep", replied Chris, "I feel like I'm 13 again!"

Thanks for reading!

Cheers!

NAR 60 Year Reunion, Part 16 - The Museum of Flight Silent Auction

The final presentation of the evening was given by Pat Fitzpatrick and Geoff Nunn on the subject of the Museum of Flight in Seattle.
Brief updates were discussed concerning the monumental task of sorting and cataloguing the vast amount of material, particularly the Stine, Estes, and Piester collections.

As a fund raising effort for the museum, some very neat items were donated for a silent auction held at the reunion.

The highlight piece was this set of the first three Estes Industries kits:  The Scout, Mark, and Space
Plane, donated by Vern and Gleda Estes.  The set is attractively mounted and framed and signed by Vern and Gleda.  (Sorry about the fuzzy photo).


Another item of interest was this famous first edition Estes catalog, # 261, the one that was stitched by Gleda on her sewing machine.  The frame includes a photo of that process.


This next item is one that any rocketeer would be thrilled to have hanging on the wall of their shop:
A canvas print of the box art for the Centuri Laser-X.  What a beautiful rendition!  This was donated by Lee Piester.


Several other canvas prints were up for auction at the event.  These were full color renditions of some famous early model rocket poster/box art, and others were of previous edition Handbook of Model Rocketry covers.  Unfortunately, the photo I took of them was too blurry to post here.

FlatCat Boost/ Glider Build, Part 9 - Makin' The Glider All 'Purty'

To start off with finishing the FlatCat, I hit it with a light coat of white sandable automotive primer. 
This is more for sealing the grain and providing a better surface after sanding for coloring the model with permanent markers. 
The trim weight cavity in the glider's nose made a perfect place to insert a dowel to hold the model for drying.


The FlatCat's primer coat is now dry, and all the surfaces get a finish sanding with 400-600 grit paper.
Now I can begin layout of my chosen décor pattern and applying the marker color coats:

YELLOW....


ORANGE....


 RED....


...and BLACK for the bottom side of the wings and horizontal stab.


The downside of coloring a wood model with markers is that it is nearly impossible to get neat, even color coverage.  There will always be marker streaks and mottling.  On a boost/glider, aesthetic appearance is the trade-off for having a light weight finish.  Still, it doesn't look too terrible.


Tuesday, August 14, 2018

Another Kit For The Build Pile....

I just picked this baby up at Hobby Lobby.


Back in the 'old fleet' days, I had a Nike-X that had been modified to fly as a two-stager: D12-0 in the booster, and 18mm upper stage.  Very nice flier.  This one I may build as a single stage D-engine bird.

When the FlatCat B/G is finished, this kit will be built alongside a couple other projects in progress - that Steampunk Protostar, an Orbital Transport, and a second FlatCat converted into a sliding wing Rocket Glider.

Plenty to keep this ol' fart busy through the end of the year.

NAR 60 Year Reunion, Part 15 - One Final Display

The last item on the row of meeting room tables was my own small display of NARAM-11 ephemera.

 
 Included was an official meet program that was distributed to visitors to NARAM 11, a copy of the newspaper coverage article of the event in the Colorado Springs Gazette Telegraph, and a stack of official NARAM 11 flight cards that I had received from Bill Roe back in the early 70s. (Bill was the CD of the meet). 

I gave away a flight card for free to any reunion attendee who wanted one.
(I still have half a dozen left if any of you blog readers wish to pm me at emitton777@gmail.com).

I also brought along for display my replica of the Carlisle Rock-A-Chute Mark II model rocket and launch pad complete with a wood dowel launch rod. These items are not vintage, actually being built in 2016.

An interesting note:  In the final hour of the reunion, I noted that someone had placed a brand new Semroc kit of the Rock-A-Chute Mark II against the wall behind the display.  It was a great mystery to me until I learned it had been put there by Randy Boadway of eRockets!  Thanks, Randy!

NAR 60 Year Reunion, Part 14 - Lee Piester at the Podium

The next member of model rocketry royalty to give a talk was Lee Piester, the man behind Centuri Engineering.


Lee gave a very interesting speech, relating the story of his conversion from amateur rocketry to model rocketry after visiting an early NARAM, his entrance into the model rocket manufacturing business with the founding of Centuri, and his friendly-rival relationship with Estes Industries.

One of the highlights of Lee's presentation was his showing an enlarged photo of the famous "Great Saturn V Duel" between he and Vern Estes. 

Betty Piester circulated through the meeting room with another copy of the photo so that everyone had a chance to see it up close.

Lee received the second long ovation of the evening as he stepped down from the platform.

FlatCat Boost/Glider Build, Part 8 - The Pop-Pod

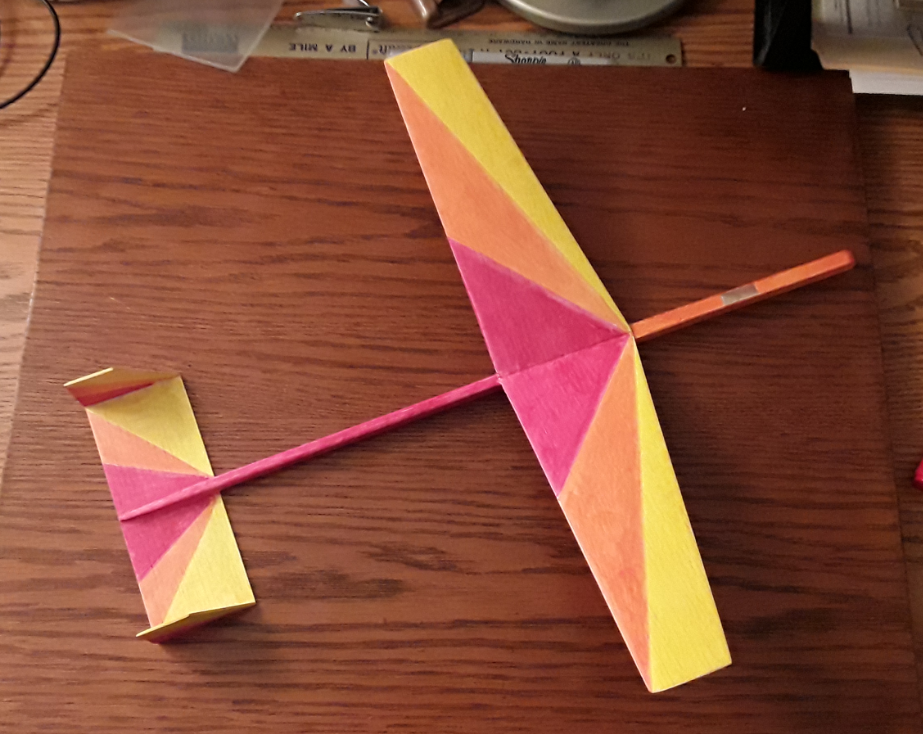
This post covers the assembly of the FlatCat's 'Removable Propulsion System Housing', a.k.a, the Pop-Pod.
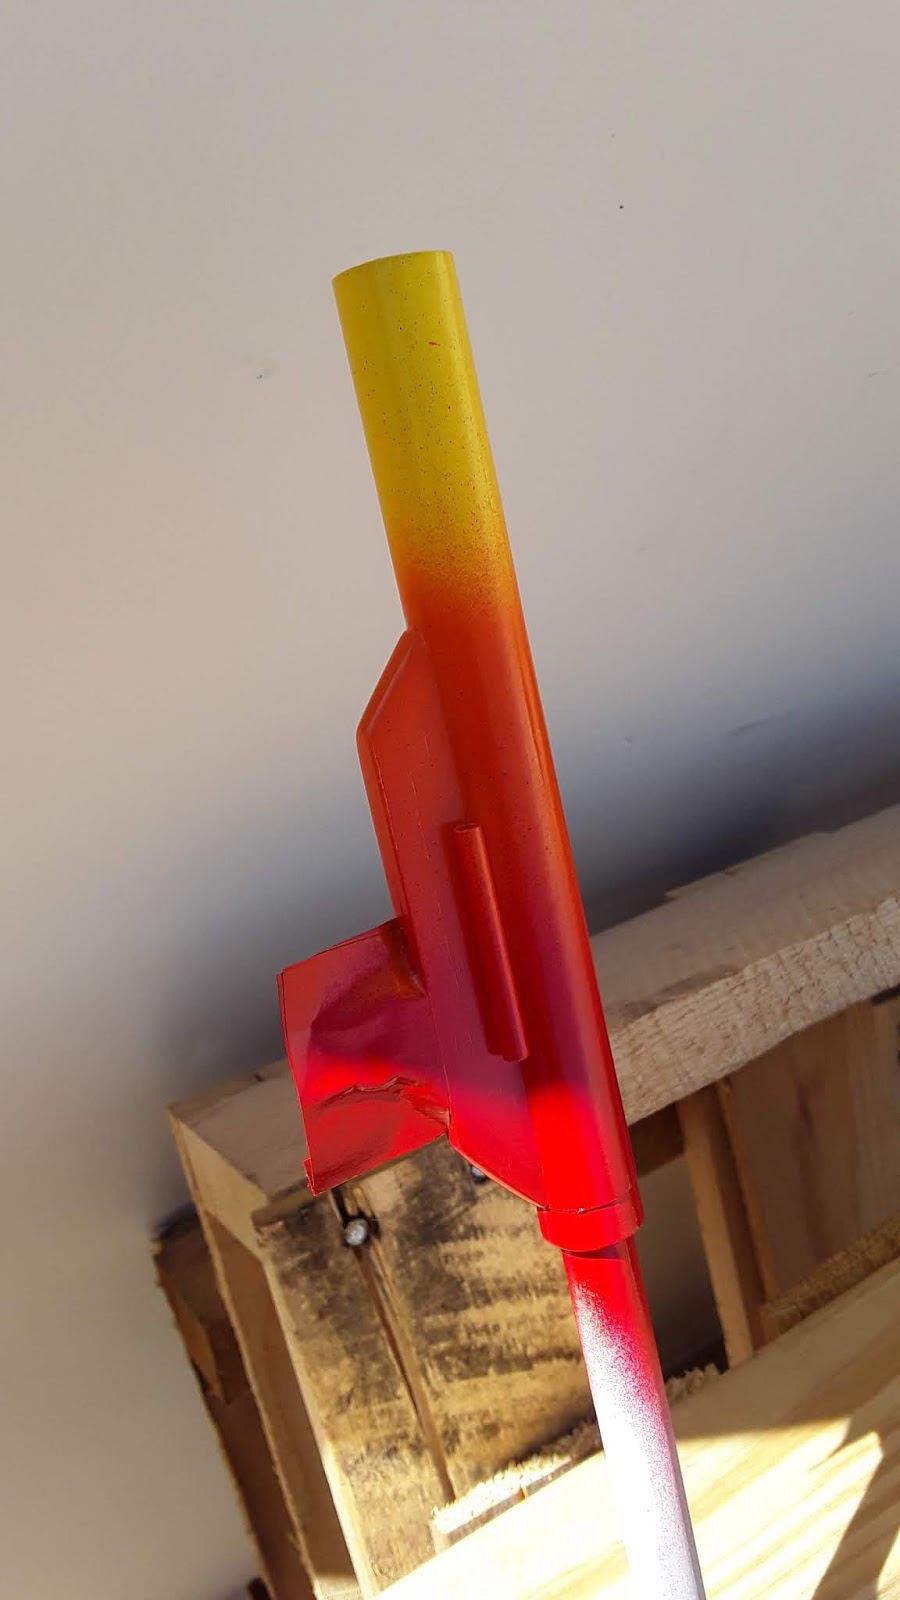
The heart of this sub-assembly is a 6 inch length of BT-20 or similar tubing.
Before any cutting and gluing begins, this is a good time to break out the CWF and fill the spiral seams.

The next procedure is to attach the motor block and retention system. 

A standard externally mounted regular motor hook can be used as shown in the plans, but I prefer to go with my internal hook system, which consists of an 18mm motor block ring and a length of .020 diameter music wire.  As illustrated below, a hook is formed to fit over the block after which the assembly is glued into place in the model's body tube. Note the slot cut in the outer edge of the ring to accommodate the thickness of the wire.


Once the assembly is dry, an expended motor casing can be inserted into the body tube and the wire bent over the end and clipped.  Here is a pic of the completed assembly.


Now it's time to make the pylon.
Another 4 inch piece is cut from the 1/4 x 1/2 balsa stock, and the ends cut to a 45 degree angle as shown in the plan diagram.


Now for a little bit of shape-sanding work. The first procedure is to round-over the leading and trailing edges.


Next, a piece of sandpaper is wrapped around an expended motor casing, and a concave curve is sanded into the long edge of the pylon.  This provides a much better contact surface for gluing to the body tube.


Which, , of course, is the very next step of the build.


Killing two birds with one stone (has anybody ever really accomplished that feat?).

The Piece-X is double glue-joint attached to the pylon at the position, and orientation (!) specified in the plans.  At the same time, some glue fillets are applied to the pylon.  The whole assembly is set aside to dry.


Over the course of the next couple of days, the pod pylon will get the usual application of CWF to fill the grain.  Gotta keep things pretty, you know.

Finally, the launch lug is attached.  This is a 1-1/2 length of 1/8" lug, with seams filled.  Yep, I do that even with boost gliders. 
When I became a BAR a couple of years ago, I promised my significant other that I would not clutter up the house with 'junky' looking rockets like I did back in the old fleet days, so every project I build now gets cleanly crafted and finished.


The pop- pod assembly is ready for primer and paint!

Monday, August 13, 2018

FlatCat Boost/Glider Build, Part 7 - Slapping The Glider Together

OK, so I don't really just 'slap' my models together.  I am a careful modeler!

The FlatCat's wing and tail sub-assemblies are completed, so now it's time to glue them to the fuselage to begin making something that resembles a real glider.

The tail is first.
After carefully marking the center of the horizontal stab and the fuselage, the unit is attached using a double glue joint. Careful attention is paid to getting precise longitudinal alignment.
The assembly is weighted down on the workbench to dry.
Here is the assembly after the glue has dried.  I've also added small glue fillets to the horizontal-vertical stab joints and the tail-fuselage joint.


While the tail fillets are drying, I move on to attaching the wings.

Using some wood blocks to support the model fuselage, the wing is attached in the precisely aligned position using a double glue joint.  A couple of other blocks support the wings in the correct 'roll' orientation.
A block of wood is marked at 2-1/2" to provide a guide for setting the wingtip heights referenced from the bench top  (1/2" for the fuselage height, and 2" for wing dihedral).
Back in my old fleet days, I would introduce a slight tilt to all of my competition glider wing assemblies to cause a wide turn in the glide path.  With this build I am going with mounting the wings with identical tip heights.  I will be relying on trim clay to introduce whatever turn needs to be added.


Glue is now dry and the glider main assembly is complete.
The next step is to go over the fuselage with a medium grit sanding block to round over all of the square edges.


This is followed by an overall sanding with fine grit paper to smooth out all of the fuselage, tail, and, wing surfaces.

Finally, some thin glue fillets are added to the wing/fuselage joints to add a little more strength.


The FlatCat glider construction is now completed and the bird is all ready for finishing.


Sunday, August 12, 2018

FlatCat Boost/Glider Build, Part 6 - The Tail Section

The beauty of building a boost/glider is that one can construct any of the several sub-assemblies while waiting for the glue to dry on all the others.
This post deals with the FlatCat's tail section.
This particular design features a 3-piece assembly - one large rectangular horizontal stabilizer, and two vertical stabilizers.
The various pieces are cut from a sheet of 1/16" thick C-grain balsa stock .  The specified dimensions are quite simple to lay out.  As with all model rockets, paying attention to specified grain direction is  important.
Here are the freshly cut parts:


The next step is to shape sand the vertical stabs.  Since this build is strictly for sport flying, and not necessarily for high performance, I'm going with just rounding the leading and trailing edges, followed by surface smoothing with 400 grit.  I'm not going to do any sanding on the horizontal stab until the entire assembly is complete and attached to the fuselage.  This will prevent me from accidently rounding the edges of gluing surfaces.

Now, the vertical stabs can be glued to the edges atop the horizontal stab using the double glue joint technique. Must remember that they are to be orientated in the same direction! (I have to constantly remind myself of these kinds of things - senior moments, you understand). The model would still fly with one stab turned the wrong direction, but it would just LOOK stupid!

A handful of LEGO bricks helps keep things aligned and at a precise 90 degree angle. (Where's THAT in the Handbook of Model Rocketry?)


Once the assembly is dry, I can apply some light glue fillets to the inner side of the h/v stab joints for added strength.  With a glider, it's best to go easy with this, since excessive amounts of glue does tend to add more weight.

The final step for this sub-assembly is to sand the corners of the horizontal stab to match the vertical stab round-overs.  This is just an aesthetic touch that's not spelled out in the published plans.

Here's the completed assembly, all ready for gluing to the fuselage.

Saturday, August 11, 2018

NAR 60 Year Reunion, Part 13 -More Fine Displays

Another one of the display tables held a large collection of early Canaroc model rocket kits.  This presentation was provided by Mr. Denis Lufkin (NAR 96987).


On yet another of the tables was a display by John Chatham of the SAI (Space Age Industries) model 'da Judge' mounted on a MMI style wood launcher.


SAI was also well-known back in the 60s and early 70s for their 'Hen Grenade' egg-lofter kit.

Right next to John's display was a small slide viewer provided by Tom Pastrick (NAR 2276)
where attendees could view pictures of early NARAMs.