Saturday, December 29, 2018

My Newest Rocket Building Tool Ever.

Now that the hustle and bustle of the Holiday season is nearly over, I have finally found some time to sit down and write a quick post, and even squeeze in a little shop time to work on some rocket builds.

A few weeks ago, when one of my daughters called asking me what I wanted for a Christmas gift, this device immediately came to mind:

A magnifying lens headset!

Just the thing for an old geezer with not-so-great eyesight to use for seeing that small detail work.

This one comes with several clip-on lenses of differing magnification levels.

It even is equipped with a VERY bright LED illumination lamp, which is kind of irritating to other persons who wish to engage me in conversation while I'm working.  I blind them when I look up at them!

Anyway, this was the perfect addition to the rocket bench tool arsenal.

And, yes, it is exceedingly and delightfully nerdy.

Just the way I like it....


Monday, December 17, 2018

Helping To Keep The Hobby Going

Even though I am not currently a member of the NAR, I firmly believe in the 'Pay Forward' mantra espoused by the organization.
In the past two and a half years since I've embraced BAR-ism, several of my 'lone wolf' launch sessions at local parks have attracted the attention of other folks who happened to be in the vicinity.
Many of these onlookers had never seen a model rocket before.  They asked a lot of questions, expressed a genuine interest in the activity, and asked how they could get started.  I would end up tearing a sheet of paper out of my field notebook and scrawling down some information to give them.

Not entirely efficient.

So, this week I took some time to sit down in front of the ol' PC and make these:


I plan to carry a dozen or so of these in my field notebook to have ready to hand out to interested potential new rocketeers who happen to stroll by during my launch sessions.

The sheets feature my contact info including the URL to this blog.

Also included are:

  • The NAR website
  • The three major model rocket club/NAR sections along the Colorado Front Range.
  • Information on where to buy model rockets locally.
  • The two main online rocketry forums.
On the back of each sheet is a copy of the model rocket Safety Code.

I figure this should be ample resource information to get anyone started.

It certainly doesn't hurt to attempt bringing in new blood to this great hobby of ours.

"Jump in, folks...The water's fine !!!"


Tuesday, December 4, 2018

Now...Back To Our Regularly Scheduled Program....

This past weekend, the BlastFromThePast shop became fully operational again.

An intensive 'Shock and Awe' barrage of medications launched at that nasty cough has started showing its effects.

The first order of business was to re-arrange the rocket-building bench (again) to accommodate the installation of a small bookshelf stereo set, a DVD player, and a small TV monitor.  Even though I generally prefer to have peace and solitude while working in the shop, there are those few occasions where I like to have music or a good concert DVD going.


Once set up, I went back to work on the Steampunk Protostar, consisting of forming more rivet panel detailing on the fins.  There wasn't anything new enough here to dedicate another build series post.

The weekend's biggest accomplishment was in sitting down and planning out the model rocketry project list for 2019. Here is a pic of all the kits in the queue waiting to be assembled:


Next year will be fairly heavy on scale models.  In addition to the ones shown here, I will be picking up the new Estes Saturn V. I never built one of those in my 'old fleet' days, so it's high time I tackle that one. Also looking to purchase a Mercury Little Joe, and maybe a Black Brant III.

Aside from scale birds, I still have an Orbital Transport partially completed, and a parts kit assembled for a scratch-built EAC Viper. 

Being a glutton for punishment, I have another FlatCat in the works, except this one will be modified as a sliding wing R/G.

Oh, and there's also that must-have-in-the-fleet 60th Anniversary Alpha! 

If time permits, there are a couple re-builds of some old fleet favorites to throw in the mix, as well.

Besides rocket builds, I plan to pull out one of those PA monitor stands I procured last year and turn it into a heavy duty launcher for the bigger birds on the build list.


Finally, I must design and build a new launch controller that can handle cluster ignition.  I may go with a relay system with that one.

Anyway, it appears that 2019 is shaping up to be quite a busy rocketry year for this old geezer, with plenty of new posting fodder for the BFTP blog!

Cheers.

Monday, November 19, 2018

Rocket Builds On Hold Temporarily

This past week I have had to take a hiatus from continuing work on the Protostar as well as a couple of other parallel builds,  The main reason is I am trying to shake off a very severe "cough due to cold".

While loading up on cough syrup, cough drops, and my wife's wonderful Korean medicinal tea, I have not  done much venturing into the basement la-BOR-atory to execute balsa butchering and to slop glue on model rockets. 

Instead, this period of relative rest and recoop has been devoted to sorting and giving some organization to the vast collection of model rocket written material which I have been accumulating over the past two years and a half.  This includes rocket  plans, instructions, fin templates, downloaded how-to articles, printouts of Model Rocketry Magazine issues, printouts of vintage catalogs, letters, photos, design doodles...the list goes on.

Armed with a stack of binders, labels, sheet protectors, page dividers, and a page-corner-rounder clipping tool, a have made substantial progress in converting this mish-mash of paper material into a well-sorted and efficiently organized model rocket reference library.

This upcoming month I have requests for a few Christmas gifts to be completed in the woodshop. Much of my time and energy will be diverted to these projects. 

Also, the Christmas season is always a time of increased demand for my musical prowess on electric violin, so there will be a definite spike in the amount of time devoted to practice, group rehearsals, and music presentations.

The 'Steampunkery' just might have to wait until the New Year....

Cheers!

Saturday, November 17, 2018

Back In The Day, Part 15 - A Photo Of Bill Roe


I have this old photo which I took in April, 1978 of none other than NAR pioneer Bill Roe (NAR #13).


Sorry for the bad image – at the time, I had a really cheap camera, and did not possess much in the way of photography skills.
The club I belonged to – Skywatchers / ROMAR, held an annual Spring demonstration launch at a shopping center at one of the busiest intersections in Colorado Springs.  The demos were sponsored by the Ru-Jan Party and Hobby Shop, located in the strip mall.

Bill would occasionally make a rare appearance at some of our club launches, but we were particularly delighted when he showed up at this public demo.
Sporting his familiar grey jumpsuit and red NAR cap, Bill had a great time, hanging around and enjoying watching the model rocket demo flights.

For this photo, I caught Bill being Bill – kneeling down and helping a young club member with prepping one of the demo birds.  Mr. Roe was all about that – making sure that rocketeers young and old alike, did things the proper way.  He was such a great guy to know and be around, as he exuded such a huge love for the hobby and sport of model rocketry.

I never saw Bill again after this demo event.  In fact, I am reasonably sure that this demo launch may have been the very last rocketry event Bill attended before he passed in 1980.

I feel very privileged at having been there.
And, I’m very glad I still possess an old blurry photograph of Bill to share with the model rocket community….


Thursday, November 8, 2018

Steampunk Protostar #24 - First Fin Attachment!

This morning, I managed to glue the first completed fin on to the Protostar body tube.


With this done it gives the appearance that I'm building an actual model rocket rather than a collection of random parts and paper panels scattered across the workbench. 

Aside from applying the glue fillet to the joint, it will be back to making riveted panels for the next couple of weeks.

Cheers!

Tuesday, November 6, 2018

Steampunk Protostar #23 - More Fin Detail

Today's build post centers around making details that will simulate riveted metal strips on the fin leading edges.

The first step is to make a template to be used to trace the required six curved strips.  The lead edge is traced on card stock using one of the fins as a guide, after which a second line is drawn defining the strip.  I arbitrarily chose a 4mm width for the template.

The template is carefully cut out from the card stock sheet.


It is then taped down to the back side of the Avery label sheet and the part is traced out.


At this point, I want to 'emboss' the rivet detail while the strip is still part of the sheet.  Things would get messy if I attempted making the rivets on such a thin cutout.

The rivets for this detail part are substantially larger than the ones on the previously made fin panels.  The process is significantly different, as well. 

Here I am using a dried up ball point pen to poke the rivets form the backside of the label sheet.

Instead of a hard backing board, I am using a piece of soft mat material, the kind that is used on electronic workbenches.  The cardboard backing from a notepad would work equally well.


Here, I am not using any reference lines or marks for placing and spacing the rivets.

Just winging it!

I don't really want the strips to conform to a 'factory-made' look. I prefer to give them the appearance of being done by eye on the ship's construction site.  Thus, they will be slightly uneven and not precisely spaced apart.  I'm hoping this will add to the 'Stemapunk-y charm' of the completed ship.

Again, the rivets are formed by pressing the pen with even pressure.  Since this is a larger round tool, I don't have as much danger of poking through the paper.


Here is a pic of the rivets from the show side.  These are much bigger and more prominent than the smaller ones used for the fin panels. A couple test rows of the small rivets can be seen in the upper right corner of the photo.


After the rivets are formed, the strip can now be cut from the label sheet.  Here is the first of six ready to be stuck in place to the fin....

 
This same method will be used for similar riveted strips to go on the fin trailing edges, nose cone, tail cone, body tube, pods, and around the various bits of proposed steampunk detailing.
 
I definitely see a lot of cutting and poking in my near future.....


Thursday, November 1, 2018

Steampunk Protostar #22 - Detail Papering A Fin


This morning, work was begun on applying the first bit of detailing to one side of a Protostar fin.

With the riveted panels separated, the first order of business was to make the matching cutouts for the holes in the fins.  Each section was positioned on the fin and the hole pattern marked out.

A little precision work with a sharp X-Acto blade produced the cutouts.


Here is the root edge panel placed on the fin.


The remaining two panels are formed and applied in the same manner.  I tried to leave a little more space between the panel edges to exaggerate the seam line so that it would be more visible. 

Back in the planning stages for this model, the original intent had been to paper the fins with one continuous sheet of label material, then scribe the seam lines with a blade.  That would have produced too thin of a line featuring raised edges.  The separate panel method I chose here seems to work better, even though it requires a lot more labor.

For this part of the build, I thank my many years of experience with stamp collecting in which I learned to carefully precision-align thousands of small pieces of paper in an album. 

Once all three panels are in place, any excess label material is trimmed from the edges.


Since the hand-cut holes in the label material are somewhat uneven and ragged, a light application of a Dremel tool with a rounded sanding stone is used to make things pretty.


Here is the completed side of one fin.


Now, it's rinse and repeat five more times. 
Phew! 

Tuesday, October 30, 2018

Steampunk Protostar #21 - Let The Detailing Begin !

Now it is time to start the good stuff - super-detailing the Protostar's freshly completed fins with the application of riveted panels. 

To accomplish this, I intend to use a method which I have never attempted before on any model rocket build.  I'm definitely in uncharted territory here.

The plan is to model individual panels with tiny rivet detail using adhesive Avery label material.  The panels will be individually made and affixed to the fin surfaces.  I'm figuring that this level of detail will be better accomplished before the fins are glued to the body and pods.

Here is a pic of the full-sheet labels. 


The first step in construction is to trace the entire fin outline on the back of one of the label sheets.


Starting with the root edge of the fin, I mark and draw lines that will define the panels themselves. I arbitrarily chose panel widths of one inch.  The layout, therefore will call for three vertical panels on each fin surface.


Next, I draw two lines on either side of each panel line, 2mm away.  These will be the guidelines for the rivet detail.  Note that I am not applying any rivet lines to the fin root edge or the opposite edge that will be glued to the fin pods.  These areas will be covered with other details later on, so rivets are unnecessary.


Now marks are made where each rivet will go along the guidelines.  I arbitrarily chose one-tenth inch spacing between rivets.  (Kind of odd that I'm going back and forth between English and metric dimensions in this process.  That's just quirky old me!) 


Again, no rivets are marked within about 5mm of the leading and trailing edges of the fins because of future detailing.

Before making the actual rivets, a little work needs to be done on the tool to be used. 

I'm going with a medium sized dental pick-type tool with which to poke the rivets in the label material.  To prevent the tool from merely punching holes through the paper, I blunt the tip with a small needle file, and try to form a rounded point.  This particular tool will give me rivets that are less than 1mm in diameter!


The other important concern is the surface on which I will be poking the rivet detail.  I chose a block of very high density fiber board, because of its extremely hard and smooth surface.  A piece of melamine covered MDF would work just as well. Any surface material softer than these would only allow the small dental pick tip to poke all the way through the label material, making holes rather than simulated rivets.


Now, carefully lining up the tool tip with one of the rivet marks on the back of the label sheet, I press downward with even pressure to make the rivet, keeping the tool perfectly vertical.  I use both hands on the pick for better control.

There is kind of a trick to doing this - enough pressure needs to be applied to make a nice dimple (rivet) protruding on the label side of the sheet, but not so much that the tool pokes all of the way through the paper.  Even trickier is to make all of the subsequent rivets on the line uniform in size and depth.  I practiced - a lot - on scrap label material until I could guage by feel how much pressure it took to make consistently good rivets, before attempting this on the actual model panels.

TIP: This type of precision work is better done while viewing through a bench mounted magnifier lamp. If you don't have one already, I highly recommend purchasing one for all of your modeling work.  Especially if you're an old geezer like me, who's eyesight ain't what it used to be!

Here's a pic of a completed rivet row as it appears on the label side of the sheet..  Not precisely perfect, but satisfactory.


Once all of the rivets are applied to the entire fin profile, the panels will be cut apart and applied to the fin surface.

But that's another post.

Cheers!


Monday, October 29, 2018

Steampunk Protostar #20 - Re-Visiting The Fins

Even though the fins for the Protostar are going to be completely covered with riveted panel detailing, I will still fill the grain and sand them out. 
The panels are to be made from self-adhesive Avery label material, so I want to have a smooth, even surface for proper adherence.

Before sealing the fins, the trailing edges are rounded over.
Sanding a round-over on curved fins is somewhat tricky.  A flat sanding block is not effective here, so the job is better done using some medium grit sandpaper wrapped around a motor casing.

The leading edges will remain squared for reasons I will address in a future post.

Now, the usual coat of brushed-on thinned CWF is applied and the fins are sandwiched between waxed paper and plate glass to dry without warping.

Followed by the ever-popular task of sanding, filling, sanding....etc. until all of the grain is taken care of.


The next task is to finish the decorative holes in the fins.  At this point, they are still a bit ragged from drilling, and are now filled with excess CWF.

A variety of Dremel sanding tips and shop-made sanding sticks (fine sandpaper wrapped around dowels)are used here to restore roundness and to smooth things out.


Before I get too much further with the fines, I want to make sure that the edges to be glued to the pods are correctly shaped.

To check this, I hold the fin and pod up to a light and align them to their proper position.  If I see light between the joint, that means there are some high points that need to be sanded down in order to make everything even for glue bonding.

Sure enough, even though the fins are laser cut, I find they don't precisely match the pod profile.

Extremely light passes are made with fine sandpaper on the high points, checking against the light frequently. 

Now, the fins are ready for rivet-panel detailing.


Friday, October 26, 2018

An Interesting Lunar Patrol Photo Sequence !

While I was pulling a still frame out of the Lunar Patrol flight video I took on my Android phone last Sunday, October 21st, I noticed something very unusual -

At ignition, the starter plug struck the launcher and bounced straight up alongside of the rocket !  It appears in each frame of this series of pictures of the launch....


Tuesday, October 23, 2018

Launch Date: 21 October, 2018 - ..And Then There Were Three...

...Old BARs, that is....

Nearly perfect model rocket flying weather prevailed as James Gazur, Mike Goss, and myself converged on Dove Valley Regional Park in Centennial, Colorado to poke some holes in the sky.
Upon arriving at the field, we found that there were two soccer games in progress, so we commandeered the other half of the field, placing our launchers at the upwind end, and where the slight breezes present would not carry any of our models in the direction of the games.


Mike started things off with a launch of  a nice looking Semroc Lune R-1, which turned in a picture perfect flight.

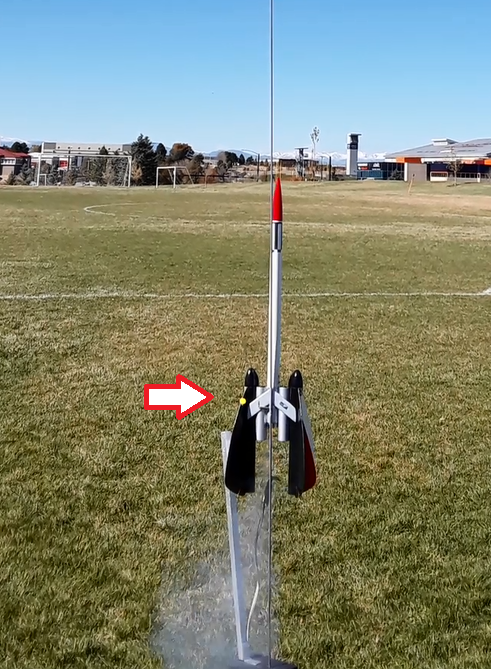
This was followed by my old flagship Hornet for its 41st launch.
This one went very well except for a broken shock cord at ejection.  The booster lawn-darted while the payload section came down on the parachute.  Both pieces were recovered intact.


Next up was Jim Gazur's 13mm motor rocket/glider based on Kevin Wickert's 'Mediocre Fred' design. Jim's model is nicely built with a carbon fiber boom and unique airfoil. The maiden flight was on a 1/2A3-2T. The model had a bit too much lift, arcing over and pranging.  Damage was minimal, and Jim figured to have it ready for another flight after a little super-glue and elevator trimming.

My two grandkids and their dad showed up to participate in the launch session. I had brought along a couple of the kids' rockets, so the next launch belonged to my grandson's recently assembled Estes Bandit.  Equipped with a crepe streamer, the model turned in a really nice flight.  I'm actually impressed at how well these E2X plastic-finned beginners models perform. 
Elegant simplicity....

By this time, Jim had the first of one of his plastic model conversions on the pad - a Revell 1/56 scale Bomarc .  The model boosted nicely on A10-3T power, but experienced a little difficulty with parachute deployment. Only a couple of tail surfaces were slightly damaged on landing.

Mike Goss soon had a very interesting boost /glider prepped to fly - An Edmonds Aerospace 'Deltie'.  This is a delta wing glider with a very unusual open wing design.  The model boosted nicely on a 1/2A3-2T.  At ejection, the glider separated and began a lazy, well trimmed, circling glide right overhead.  The model landed gently nearby.  Beautiful flight!

Encouraged by Mike's excellent glider flight, I deemed it was time to break out my recently built Lunar Patrol for its long-anticipated maiden flight.

Upon ignition, the model boosted straight up to about 400 feet on a B4-2 motor, ejected its parachute, and deployed both gliders perfectly.  The delta wings floated in very stable glide patterns downwind to the far end of the field. One of the gliders was so well trimmed that it stayed aloft for well over two minutes.  Not bad for a delta. All parts were successfully returned by the expert recovery crew.


A Revell 1/40 scale Nike Hercules was Jim Gazur's next model to leave the pad. The nice looking model was boosted by an A10-3T motor, but was a bit to heavy and draggy.  The model lawn darted just as the ejection charge went off.


Next up on my own 'mission agenda' was the maiden flight of the newly built FlatCat boost/glider.
The model boosted nice and straight on a B4-2 motor.
After ejection, the glider seemed to hang up on the pod.  I was expecting a 'Red Baron', but after a couple of seconds it broke loose and immediately settled into a stable glide.
The glide trim on the FlatCat was absolutely perfect!
Too perfect, in fact....


The slight wind began carrying the bird downfield, without too much perceptible sink rate.  Obviously, there was some thermal action going on up there. 

Realizing this bird was going to go a long ways, I began giving chase.  The model flew well out of the park boundary and continued on, still at a respectable altitude. I crossed the parking lot and the adjacent street before losing sight of the glider. 

Walking about another half mile across a large weedy field, I was stopped by a high chain link fence proclaiming 'NO TRESPASSING'.  Ah, yes, the boundary of Centennial Airport.  I know the FlatCat flew well into that area, not to be retrieved. 

Sadly, this is my first model loss since becoming a BAR.  It was bound to happen sooner or later.  I still have the pop-pod, however, so it won't be much of a problem to build another glider. 

I am still amazed that a FlatCat would turn in such a great performance. 

I hope G. Harry was looking down on that one....and smiling....


Meanwhile, during the time I was away chasing after the Flatcat, Jim and Mike continued launching.

Jim flew his rebuilt Heller 1/125 scale Ariane plastic conversion model, this time using a D12-3 motor.   The flight went very well.  Unfortunately, I was not there to take the usual photos and/or flight video, so I don't have any pics to post of this flight.

Next up, Mike Goss launched a nice Fliskits Overdrive for an excellent flight using 1/2A3 -4T power.  He later flew the model for a second successful run.

Soon after, Jim  was back in the action again with yet another fine plastic model conversion. This one was his Pegasus 1/48 scale V-2, the same one he flew at Castle Rock back in September.  Today the model flew very nicely on a B6-2 motor, and was recovered intact.  Again, I didn't get any pics on this one either, as the flight took place while I was still out trying to catch that 'dern fool' FlatCat....

The next bird to go on the pad was Mike's nicely built Estes Vector Force.  The model turned in an excellent flight on a B6-4 motor.  This would be Mike's final launch of the day, but kudos to him for achieving 100% success rate on all of his launches!

Nearby, Jim was prepping a larger model.  He describes the model as a "generic test-bed vehicle for testing a dual deployment system".  Utilizing a Perfectflite Stratologger CF altimeter to activate a cable cutter on the main chute at a predetermined altitude, the model was powered by a D12-5 motor.
Things didn't quite work out as planned when the cutter fired but failed to cut the cable.  The model still recovered successfully on a partially opened parachute.

Next up was my two stage model consisting of a Centuri Star Trooper atop an open air gap booster stage.
The model lifted off on a nice straight-up trajectory, but there was no staging action...until about three seconds into the flight.  The Trooper's motor iginted at a fairly high altitude, and the bird arced over toward the north.  The ejection smoke was visible, but there was no sign of a descending rocket or streamer after that.  Both the Trooper and booster stage went un-recovered.  Two lost models in one day??? Sheesh !
Later I discovered that I had mistakenly installed an A10-3T in the booster stage instead of the intended A10-0T.  Oops!  That explains the delayed upper stage ignition.  Anyway, the mission objective was successful in that I confirmed operation of open gap staging suitable for a planned upcoming WAC Corporal / Tiny Tim scale build.

The final flight of the day went to Jim Gazur's 'Mediocre Fred' R/G, all patched up from the previous flight and adjustments made to boost phase trim.
This time the model  flew perfectly straight up, but failed to pull out of a dive and pranged again, this time damaging the motor pod.  Jim was still delighted with the flight as it is a 'proof-of -concept' design for a future R/C controlled version. 

With this done, it was time to pack up and head home, smelling of BP and chute powder.  Today's launch session netted a total of seventeen model rocket flights in a two hour time span.  Not bad for a trio of old geezers and a crack recovery crew of grand-kiddoes!


-Ed